Category: Travel

  • The 15 Most Beautiful Islands in Thailand

    The 15 Most Beautiful Islands in Thailand

    Thailand is known as having several of the most beautiful tropical islands in Southeast Asia. Its islands are blessed not only with paradisiacal beaches of fine white sand, but also with numerous limestone islets dotted around them. The development of tourism has made it possible to maintain a lively and dynamic atmosphere day and night with a variety of interesting entertainment activities such as pubs, bars, dive sites, spas, etc.

    1.Phuket

    Phuket

    Being the largest island in Thailand, Phuket extends over an area of 540 km², towards the south of the country. The landscapes are varied: islands of all shapes, mountain ranges, caves, waterfalls, rocky cliffs and primitive forests. Arriving in Phuket, do not forget to visit Patong – the cleanest and most beautiful beach on this island, where you can take part in many entertainment activities and watch live shows.

    2. Koh Phi Phi

    Koh Phi Phi

    It is an archipelago which consists of 6 small islands: Ko Phi Phi Don, Ko Phi Phi Leh, Ko Mai Phai, Ko Yung, Bida Nok and Bida Nail. Koh Phi Phi is highly appreciated by domestic and international travelers for its emerald water and poetic landscapes. Koh Phi Phi is located towards the south of Thailand. From Krabi, it takes more than an hour by boat. In Koh Phi Phi, besides swimming, you can snorkel to admire the coral reefs and visit islands such as: Monkey Island, Bamboo, Maya Beach, etc.

    3. Koh Poda
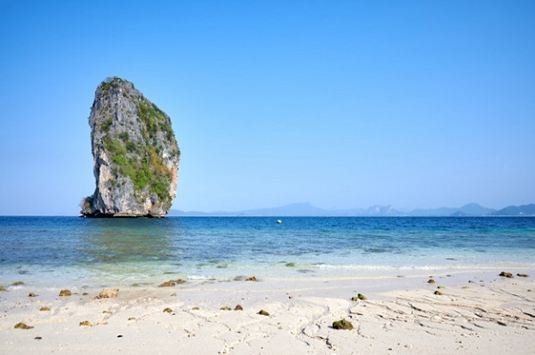
    Koh Poda is in the province of Krabi towards the west of Thailand. Blessed with a year-round mild climate, blue water and white sand, Koh Poda is considered a sparkling pearl that attracts the interest of tourists from all over the world. In addition to underwater sports, taking it easy on the beach and watching the sunset is also a memorable experience. A destination not to be missed.

    4. Koh Tao
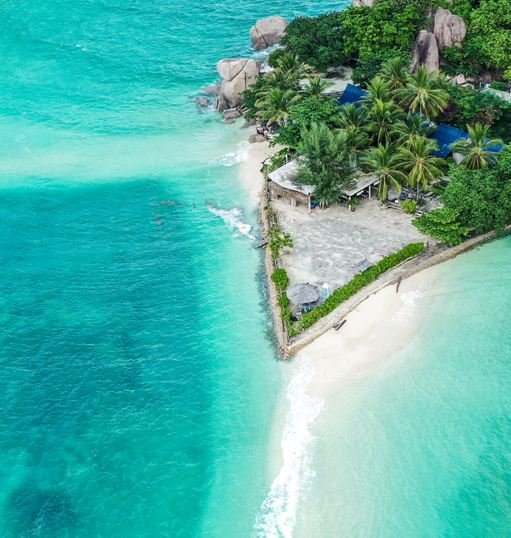
    Koh Tao

    Koh Tao is located in the east of Thailand on an area of 21km2 with about 2,000 inhabitants. Being small, but the island is favored by nature by consisting of a very varied ecosystem and clean air all year round. You can experience attractive sports activities such as: diving to admire the coral reefs, fishing by taking the baskets, running, cycling, climbing on the mountains, etc.

    5. Koh Chang
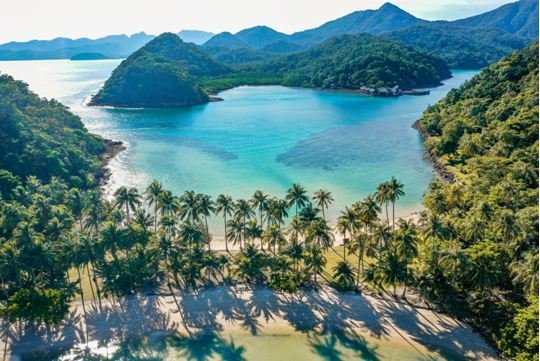
    Koh Chang is a famous island in the Trat province in the east of Thailand. Sharing the common border with Cambodia, this island has an area of 429 km² (the second largest island of Thailand). The main island of Koh Chang is surrounded by 51 islets. Koh Chang has a pleasant climate with transparent water and fine white sand beaches. It is advisable to try some water activities such as: surfing, kayaking, parachuting, fishing and diving. The most suitable time to visit the island is from November to February.

    6. Koh Phangan
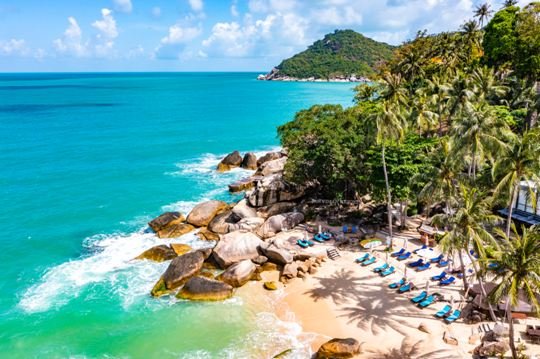
    Koh Phangan

    Although recently known, Koh Phangan is as attractive as the other islands that have already been famous for a long time. The path leading there is quite difficult, but the island is definitely worth the detour. Koh Phangan is 400 miles south of Bangkok. From the capital you take the bus or train to Koh Samui. From there, you take a 45-minute boat ride to Koh Phangan. The most beautiful beach on Koh Phangan is Haad Rin. There, night parties are often held and you can easily join them. Koh Phangan is also ideal for sunbathing and diving.

    7. Koh Samui
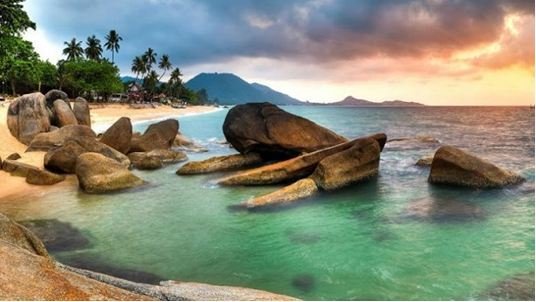
    Koh Samui

    Koh Samui is a name already familiar to admirers of Thailand’s beaches. Being a renowned place of relaxation, Koh Samui provides 5 * services such as: accommodation, restaurants, spa, etc. The island acquires a beauty that other destinations cannot have. The harmony of crystal clear water and primeval forests is highly appreciated by adventure fans.

    8. Koh Tarutao
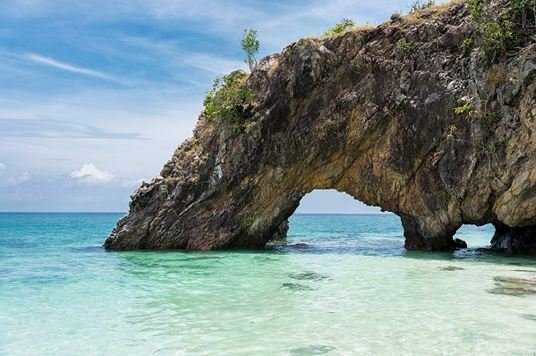
    Koh Tarutao

    On the border with Malaysia, in the very south of Thailand, Tarutao National Park encompasses around fifty islands scattered in the Andaman Sea, most of them deserted. This archipelago is one of the most beautiful – but also the wildest – regions of Thailand. Covered in jungle and lined with immaculate sandy beaches, the eponymous island of Ko Tarutao, placed under the protection of the park, spreads over nearly 160 km2 of morning landscapes of the world, totally preserved and uninhabited, except for a few forest guards. An island with the taste of paradise lost, recommended for backpackers who have a Robinson Crusoe soul. Nothing is more pleasant than having a glass of wine in the candlelight by the beach in Koh Tarutao.

    9. Koh Lanta
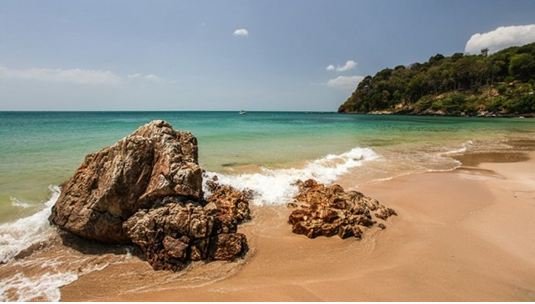
    Koh Lanta

    Ko Lanta or Koh Lanta is a coastal island in the Andaman Sea located in southern Thailand, in the province of Krabi. It is divided into two islands separated by a mangrove, Ko Lanta Noi to the north and Ko Lanta Yai to the south, the latter concentrating the tourist facilities. A bridge between the two islands was inaugurated on April 22, 2016.

    10. Koh Samed
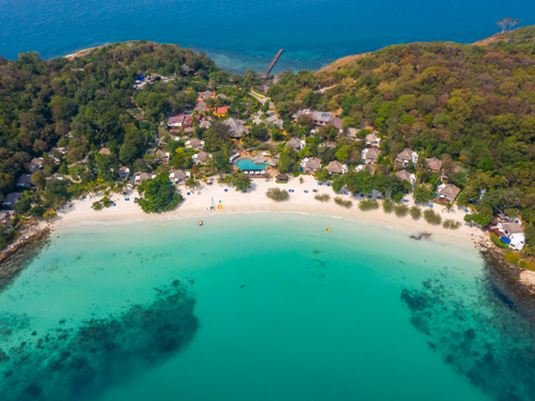
    Koh Samed

    Koh Samed is a pretty little island located in the southeastern part of Thailand. This place is best suited for those who love tranquility and want to immerse themselves in nature. In terms of popularity, Koh Samed is no match for the above islands. But if you talk about the beauty of nature here, Koh Samed is no less. Another long beach of white sand and clear blue water but Koh Samed is even more special when it contains caves and ecosystems hidden deep in the seabed. Koh Samet is very popular with foreign tourists, but also Thai tourists. Close to Bangkok, it is the ideal place to come and enjoy a weekend on a friendly island that is ideal for relaxation. The island belongs to Khao Laem Ya – Mu Ko Samet National Park.

    11. Koh Mak
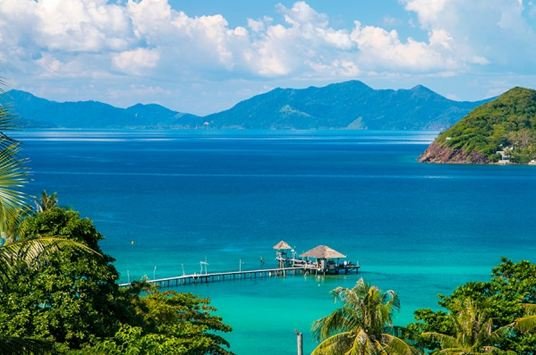
    Koh Mak

    Far from being the most famous island, Koh Mak or Ko Mak in Thailand is one of those secret islands, preserved from mass tourism. Despite its small size, it is absolutely worth the detour. Wedged between the most famous Koh Chang and Koh Kood near the Cambodian border, the island of Koh Mak enjoys an exceptional geographical location. An ideal destination for a break of a few days on dream beaches during your trip to Thailand.

    12. Koh Kradan
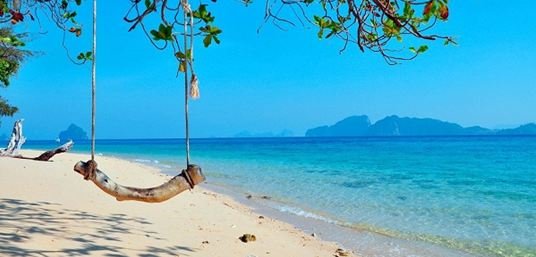
    Koh Kradan

    Koh Kradan is located on the west coast of Thailand and is still one of the absolute dream islands in the south of the country. This gem is part of the Had Chao Mai National Park and is one of the ultimate high points in the Andaman Sea. Here you will find a picture-perfect kilometer-long beach, turquoise blue sea water, an untouched underwater world, deep jungle and, last but not least, plenty of rest and relaxation. Far from mass tourism, Koh Kradan is a popular island for travelers and backpackers who like to travel individually and experience Thailand on their own.

    13. Koh Mook
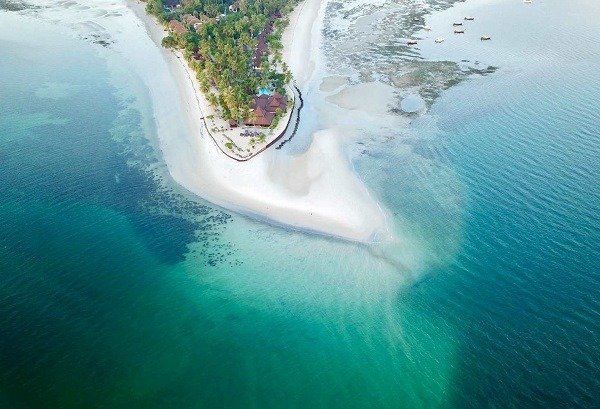
    Koh Mook, also called Koh Muk, is an idyllic small island in the Andaman Sea located in southern Thailand. Much of the island is made up of deep jungle, untouched nature and quiet little villages. The coast of the island is lined with palm trees, gigantic cliffs and beautiful beaches. Finally, the breathtaking Emerald Cave and the white sand beach of Sivalai, make Koh Mook one of the most spectacular islands in Thailand.

    14. Koh Lipe
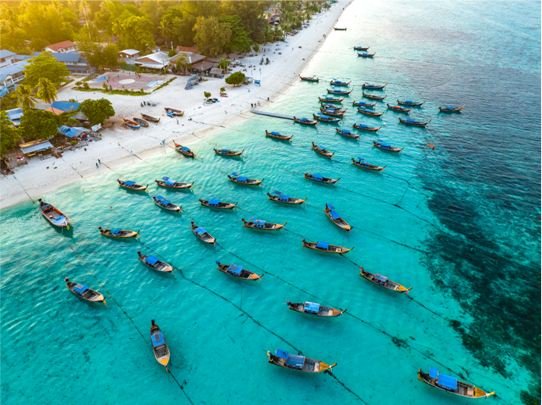
    Koh Lipe

    Koh Lipe is a small island in the southern part of the Andaman Sea in Thailand. It is located in the province of Satun, near the island of Langkawi (Malaysia), about 60 kilometers (38 miles) from the coast. It is part of the Tarutao Marine National Park, a large group of over 70 islands, as well as part of a smaller group of islands called the Butang Islands or Adang Archipelago. Koh Lipe is famous for diving and snorkeling as well as for the beautiful beaches and relaxed atmosphere.

    15. Similan Archipelago

    Similan Archipelago

    The Similan Islands archipelago is located about sixty kilometers west of Thai Muang. The archipelago is made up of a set of nine granite islets covered with lush tropical vegetation. They arise from the turquoise waters of the Indian Ocean, called the Andaman Sea here. The show is fabulous and unforgettable. Small beaches of almost immaculate white coral sand border some of the islets.
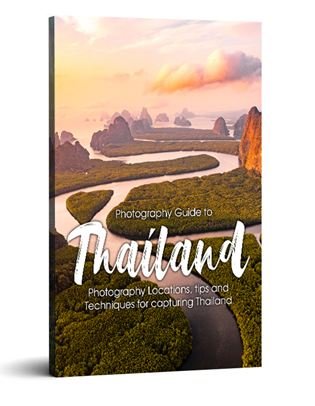
    Photography Guide to Thailand

    If you’d like to see more beautiful islands in Thailand, check my Photography Guide to Thailand, with 418 pages covering in details all the most photogenic islands, landscapes, temples and much more!
  • How do I prepare a photo trip ?

    How do I prepare a photo trip ?

    Many people ask me how do I know where are all the places to shoot, how do I prepare every trip, so I’ll share my routine here.

    1) Collect, collect, collect !

    First thing first : collect !
    I follow quite a lot of photographers, especially in Thailand, because I live in Bangkok and with covid I don’t have much choice to travel internationally these days, so I focus on traveling locally.

    You can follow these great talented photographers : @sebastien.nagy, @thismattexists, @withluke, @tiffpenguin, @trystane, @patkay, @seven7panda, @koalamarty, @f.khnnt, @florisgone, @gavsgoneagain, @phantomminn, @sunny_rung, @janderycke, @asiaanbeyond, @patoss, @demas, @donamtykl, @hasinghaa

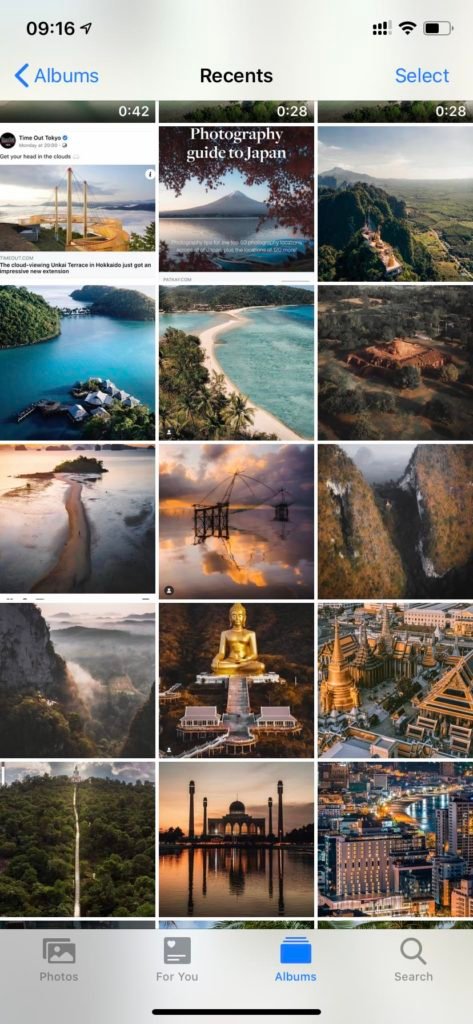
    So every time I see a beautiful photography or a beautiful place on instagram, I screenshot it.
    Every few weeks I check my phone and I organize all these screenshots by country / province / city.
    Before going to a place, I also check what’s around on google : for example “name of the city” + “things to do”. And same here, I save all images I find interesting to visit or to photography and I organize them in folders.

    2) 1st document : photo selection by location

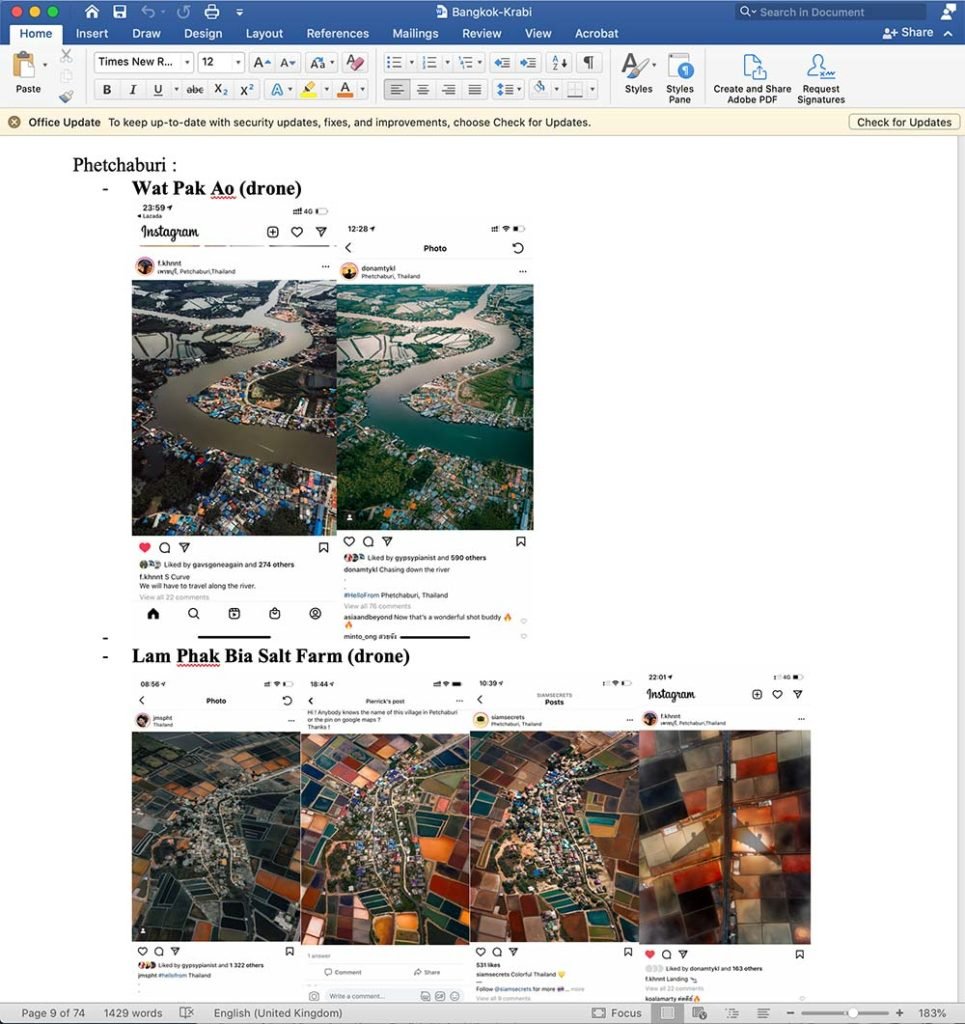
    With all the images collected, I create a 1st word document with all the best photos that I want to take. Most of the time I end up taking different pictures of the same location, but it’s a reference, and it usually gives me a good starting point for the angle or viewpoint.
    Then I organize it by location like the example on the left : Thailand / Province (here Phetchaburi) and the photos of the same location.

    3) Itinerary :

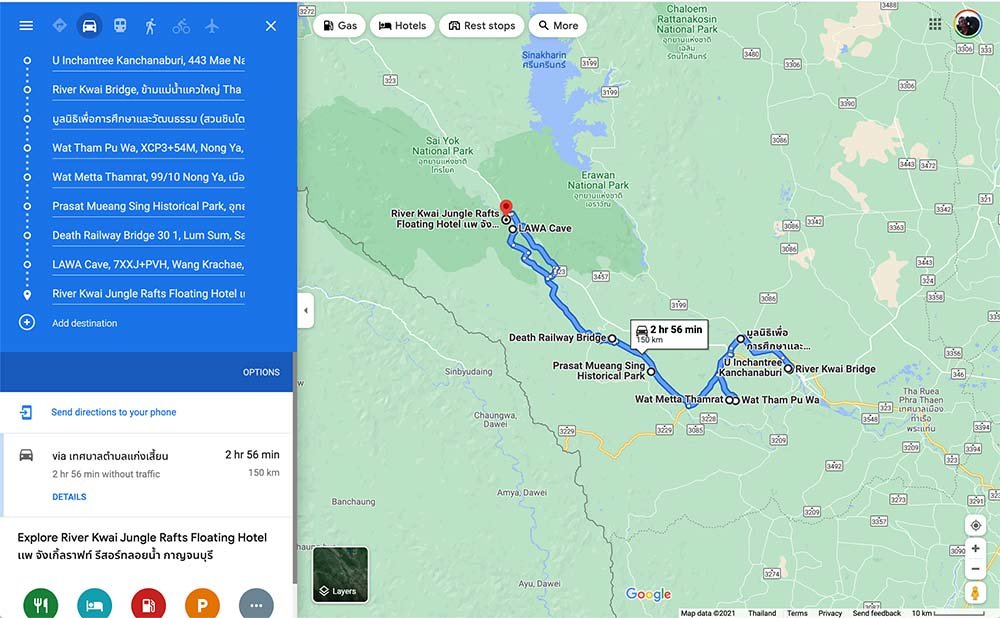
    From that document, I then search all precise locations on googlemaps.
    This usually can take quite a lot of time, especially here in Thailand, because the alphabet is different, and most of photographers don’t indicate the precise location where they took the pic. If you ask, some will tell you, but most of the time they won’t. So it needs a lot of search on google, travel blogs, tripadvisor etc… to find the exact name of the location (for example the name of the temple or the village), and then to find the exact location on googlemaps.
    For example if I see a nice photo of a rice terrace in Chiang Mai, that would be very difficult to find the exact location, because Chiang Mai is a very big province, and there are many different places to see different rice terraces. But it’s not impossible ! So for this example, I’ll check google “most beautiful rice terraces in Chiang Mai”, I’ll check all travel blogs and collect again all images and locations. Once I find several pictures of the exact same place, I’ll check 2 things on googlemaps : satellite view and street view.
    Satelitte view will show me if this is the right place, especially for drone views. And it will also show me the different places around where I could launch my drone safely. I usually search for empty space a bit away from the touristic place, so I do not bother anyone when taking off and landing.
    Street view (if available) will show me if this is the exact place I’m looking for and it will give me details for other things : if the road is ok, if there are places to park, places to eat around, etc…

    At the end, I put all these exact locations in googlemaps and it gives me an itinerary (using the direction button + add new stop). I’ll then change the order of the places to visit to shorten the most the itinerary. I cut then each itinerary into 6-9 stops, which is equivalent to 1 day. Normally not more than 200-300km per day or 4-5 hours of driving. That’s my limit. Here it’s up to everyone : some people will prefer to chill and relax and do just 2 or 3 stops in 1 day, some will do more. For me 6 to 8 stops in 1 day is my limit. And at the end of the itinerary, depending on where is my last stop, I’ll search for an hotel around there.
    I also change the order of the stops depending on sunrise and sunset : if there are very beautiful places to visit, it’s usually best to shoot around the golden hour (1 hour after sunrise or 1 hour before sunset).
    And some places require some exact hour to visit, for example a cave which have a beam of light only for 1 or 2 hours in the morning, then I’d have to arrange that as well.

    4) Final document day by day

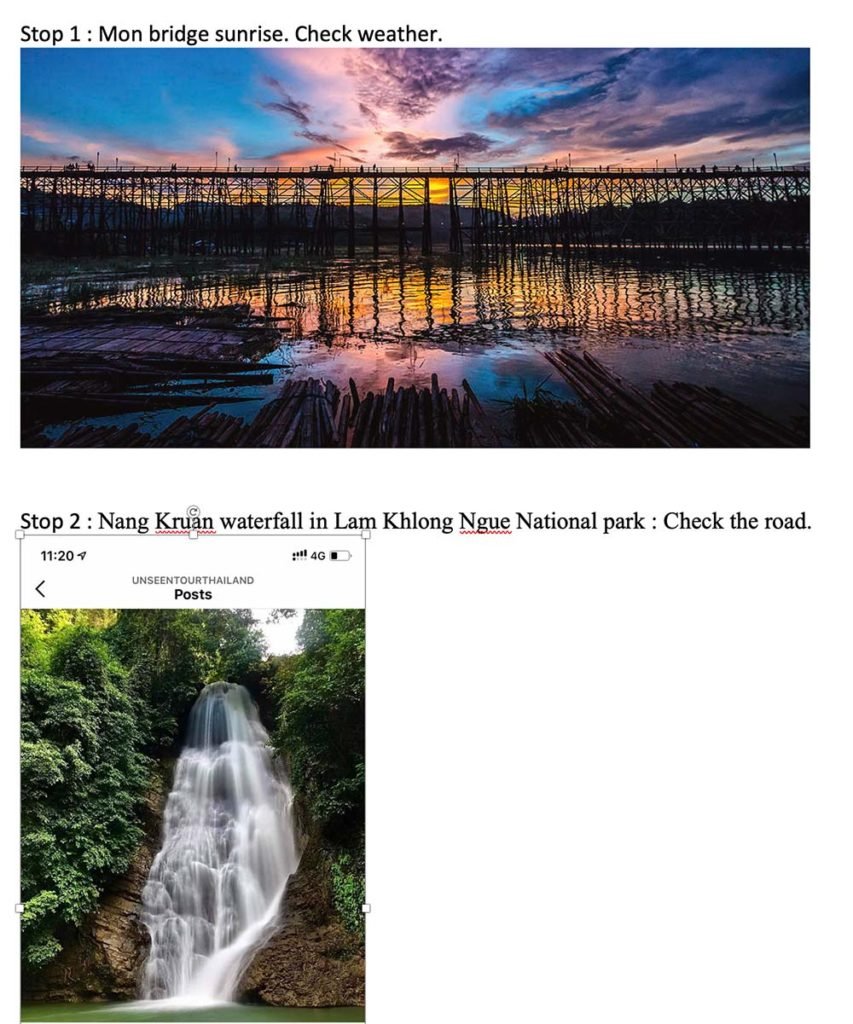
    This the final document I use all the time when I travel.
    I separate all itineraries day by day (Day 1, day 2, day 3, etc…) and I send it to my email.
    When I drive, I use the googlemaps itinerary, and when I arrive at the destination, I open the document to see what photos I need to take. And then I take 100 more, changing angles, vantage point, zoom, altitude for drone, panoramas, etc, etc…
    From these 100, I’ll keep about 40-50 to edit, and then I select about 20 to 30 to sell. Probably 20 to 25 will be approved on stock photography websites.

    Each day of shooting is about 100-200 photos that I sell on stock agencies, which represents around 5-10$ of sales added to my passive revenues each month. Here I’m only talking about travel photography. Photoshooting with model is another thing, I’ll talk about it in another post.
    At this time today (mid september 2021), I’ve done my best month with 1,000$ (usd) of passive revenues from stock photos and videos. And my revenues keep growing as long as I continue uploading new photos regularly.
    If you want to know how to have similar passive revenues, you can check my training : www.photostockacademy.com

  • Comment préparer un voyage photo ?

    Comment préparer un voyage photo ?

    Beaucoup de gens me demandent comment savoir où se trouvent tous les endroits où shooter, comment préparer chaque voyage, alors je partage ma routine ici.

    1) Collecte, collecte, collecte !

    Première chose à faire : Collecte !
    Je suis pas mal de photographes, notamment en Thaïlande, car je vis à Bangkok et avec le covid je n’ai pas trop le choix de voyager à l’international ces jours-ci, donc je me concentre sur les voyages locaux.

    Vous pouvez suivre ces photographes talentueux : @sebastien.nagy, @thismattexists, @withluke, @tiffpenguin, @trystane, @patkay, @seven7panda, @koalamarty, @f.khnnt, @florisgone, @gavsgoneagain, @phantomminn, @sunny_rung, @janderycke, @asiaanbeyond, @patoss, @demas, @donamtykl, @hasinghaa

    Alors à chaque fois que je vois une belle photo ou un bel endroit sur instagram, je fais une capture d’écran.
    Toutes les quelques semaines, je vérifie mon téléphone et j’organise toutes ces captures d’écran par pays / province / ville.
    Avant de me rendre dans un lieu, je vérifie aussi ce qu’il y a autour sur google : par exemple “nom de la ville” + “choses à faire”. Et pareil ici, je sauvegarde toutes les images que je trouve intéressantes à visiter ou à photographier et je les organise dans des dossiers.

    2) 1er document : selection de photo par lieux

    Avec toutes les images collectées, je crée un 1er document avec toutes les meilleures photos que je souhaite prendre. La plupart du temps, je finis par prendre différentes photos du même endroit, mais c’est une référence, et cela me donne généralement un bon point de départ pour l’angle ou le point de vue.
    Ensuite je l’organise par lieu comme dans l’exemple de gauche : Thailand / Province (ici Phetchaburi) et les photos du même lieu.

    3) Itinéraire :

    A partir de ce document, je recherche ensuite tous les emplacements précis sur google maps.
    Cela peut généralement prendre beaucoup de temps, surtout ici en Thaïlande, car l’alphabet est différent et la plupart des photographes n’indiquent pas l’endroit précis où ils ont pris la photo. Si vous demandez, certains vous le diront, mais la plupart du temps ils ne le feront pas. Il faut donc beaucoup de recherches sur google, blogs de voyage, tripadvisor etc… pour trouver le nom exact du lieu (par exemple le nom du temple ou du village), puis pour trouver le lieu exact sur googlemaps.
    Par exemple, si je vois une belle photo d’une terrasse de riz à Chiang Mai, il serait très difficile de trouver l’emplacement exact, car Chiang Mai est une très grande province et il existe de nombreux endroits différents pour voir différentes terrasses de riz. Mais ce n’est pas impossible ! Donc, pour cet exemple, je vais vérifier sur Google “most beautiful rice terraces in Chiang Mai”, je vais vérifier tous les blogs de voyage et collecter à nouveau toutes les images et tous les lieux. Une fois que j’aurai trouvé plusieurs photos du même endroit, je vérifierai 2 choses sur googlemaps : la vue satellite et la vue sur la rue.
    La vue satellite me montrera si c’est le bon endroit, en particulier pour les vues par drone. Et cela me montrera également les différents endroits autour desquels je pourrais lancer mon drone en toute sécurité. Je recherche généralement un espace vide un peu éloigné du lieu touristique, donc je ne dérange personne lors du décollage et de l’atterrissage.
    Street view (si disponible) me montrera si c’est exactement l’endroit que je recherche et me donnera des détails pour d’autres choses : si la route est bonne, s’il y a des places pour se garer, des endroits où manger autour, etc. ..

    À la fin, je mets tous ces emplacements exacts dans googlemaps et cela me donne un itinéraire (en utilisant le bouton de direction + ajouter un nouvel arrêt). Je changerai alors l’ordre des lieux à visiter pour raccourcir au maximum l’itinéraire. Je découpe ensuite chaque itinéraire en 6-9 arrêts, ce qui équivaut à 1 journée. Normalement pas plus de 200-300 km par jour ou 4-5 heures de conduite. C’est ma limite. Ici, c’est à chacun de décider : certains préféreront chiller et se détendre et ne faire que 2 ou 3 arrêts en 1 journée, d’autres en feront plus. Pour moi, 6 à 8 arrêts en 1 jour est ma limite. Et à la fin de l’itinéraire, selon où est mon dernier arrêt, je chercherai un hôtel dans les environs.
    Je modifie également l’ordre des arrêts en fonction du lever et du coucher du soleil : s’il y a de très beaux endroits à visiter, il est généralement préférable de photographier autour de l’heure dorée (1h après le lever ou 1h avant le coucher).
    Et certains endroits nécessitent une heure précise pour être visités, par exemple une grotte qui n’a un faisceau de lumière que pendant 1 ou 2 heures le matin, alors je devrais également m’organiser.

    4) Document final au jour le jour

    C’est le dernier document que j’utilise tout le temps quand je voyage.
    Je sépare tous les itinéraires jour par jour (Jour 1, jour 2, jour 3, etc…) et je l’envoie sur mon email.
    Quand je conduis, j’utilise l’itinéraire googlemaps, et quand j’arrive à destination, j’ouvre le document pour voir quelles photos je dois prendre. Et puis j’en prends 100 de plus, en changeant d’angles, de point de vue, de zoom, d’altitude pour drone, de panoramas, etc, etc…
    De ces 100, j’en garderai environ 40-50 à éditer, puis j’en sélectionnerai environ 20 à 30 à vendre. Probablement 20 à 25 seront approuvés sur les sites Web de photographie de stock.

    Chaque jour de shooting, c’est environ 100-200 photos que je vends sur des agences de stock, ce qui représente environ 5-10$ de ventes ajoutées à mes revenus passifs chaque mois. Ici, je ne parle que de la photographie de voyage. Le shooting photo avec modèle c’est autre chose, j’en parlerai dans un autre post.
    Aujourd’hui (mi-septembre 2021), j’ai fait mon meilleur mois avec 1,200 $ (usd) de revenus passifs provenant de photos et de vidéos. Et mes revenus ne cessent de croître tant que je continue à uploader régulièrement de nouvelles photos.
    Si vous voulez savoir comment avoir des revenus passifs similaires, vous pouvez consulter ma formation : www.photostockacademy.com

  • Travel Thailand : Kanchanaburi 5D/4N itinerary

    Travel Thailand : Kanchanaburi 5D/4N itinerary

    For my trip in Kanchanaburi, I rented a car in Bangkok and divided my trip in 5 days/4 nights to cover as many attractions to photograph as I could. This was a tiring trip, but I made the most if it !

    This was my itinerary for Day 1 : googlemaps link here.

    1st stop : Wat Khao Sung Chaem Fa

    This temple is not very famous with tourists but this is an hidden gem !
    At the entrance you feel like you’re in Japan with the hundreds of Torii gates going up to the main temple, passing some Ganesh and Big buddhas statues.
    On top of the hill you’ll find a reclining golden buddha, a huge statue of a monk, a bigger statue of a snake dragon spitting water in a pond full of fishes surrounded by trees and small japanese bridges.
    It’s quite a bit messy but it’s perfect for nice photo opportunities.
    You can also launch your drone easily from the parking, and because this temple is not crowded, you wouldn’t bother anyone flying around.

    2nd stop : Wat Tham Khao Noi & Wat Tham Sua

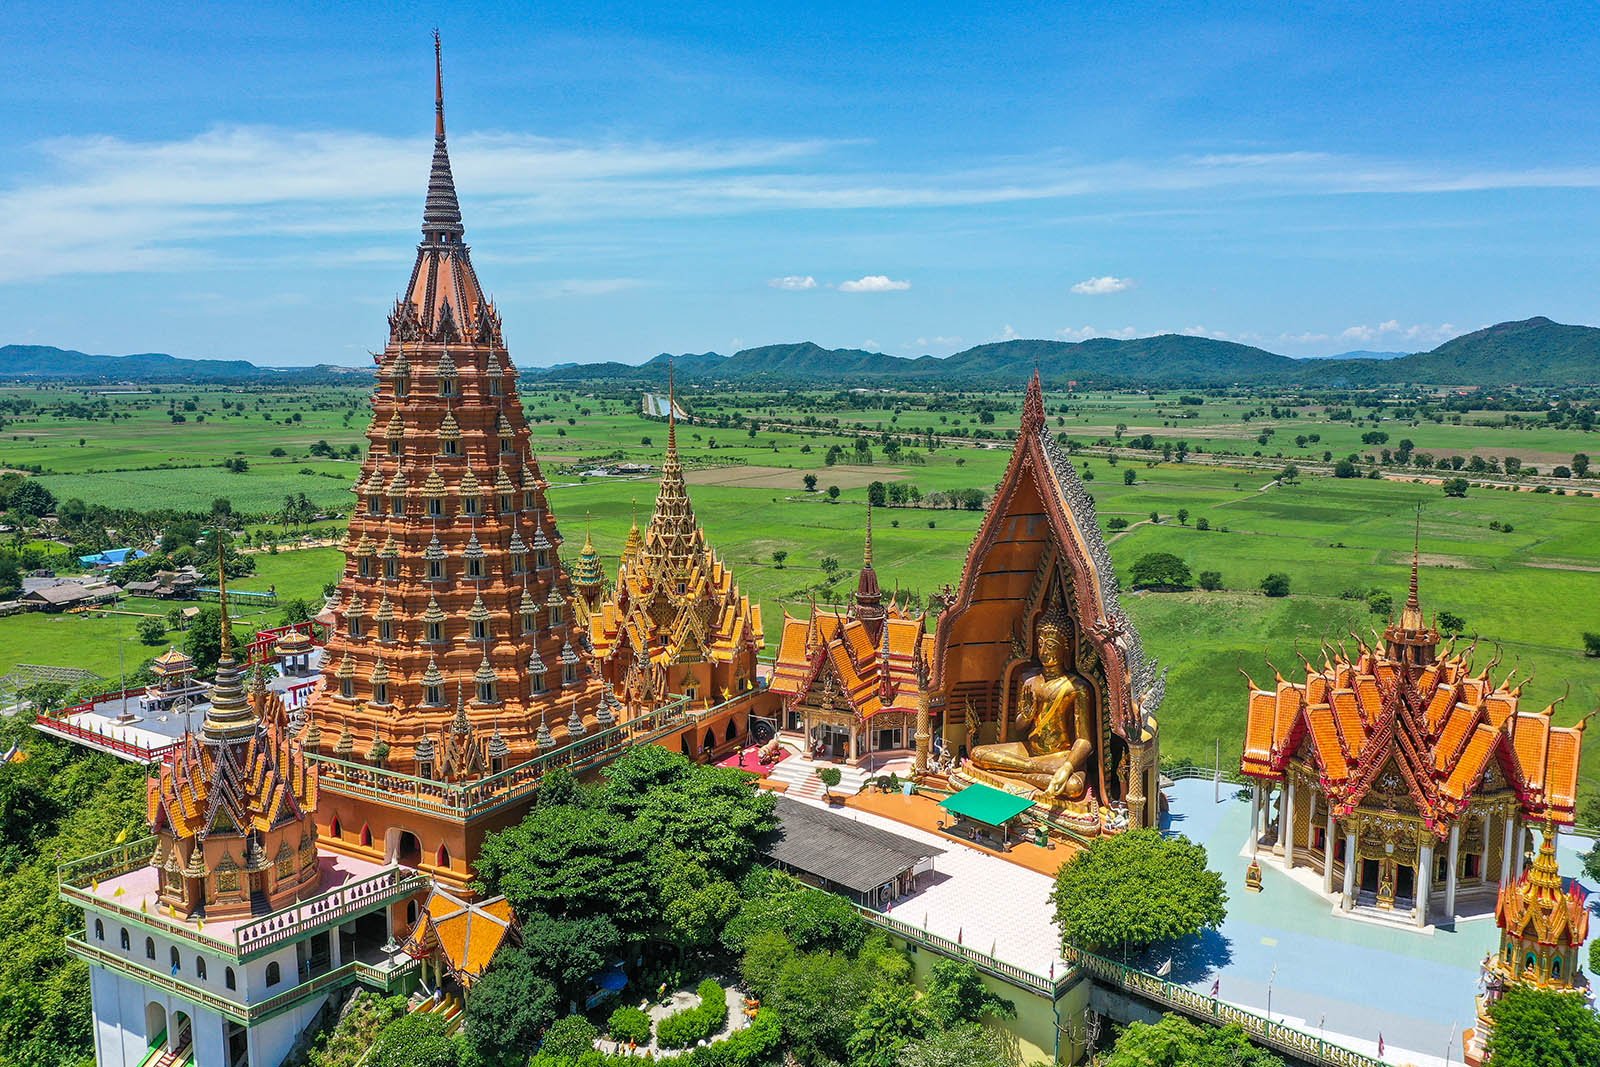
    This is the main attraction and the most beautiful temple in Kanchanaburi.
    It’s composed of 2 different temples with 2 different entrances. Be prepared to climb a lot of stairs !

    Wat Tham Sua is the main temple with the giant sitting buddha. I strongly suggest to climb on top of the biggest tower (on the left near the entrance) where you can have the best view of the whole complex.

    Wat Tham Khao Noi is the chinese tower temple. It’s less impressive than wat Tham Sua but it has great views from the top of the tower (I think 8 or 9 floors to climb though!).

    In term of photography, I recommend to go there either for sunrise or sunset to get the best colours.
    For drone, it’s very simple to launch the drone from one of the parkings.
    I also recommend to drive around the rice fields to get some views from far away. There are some good cafes like Rak Kanna Café or Meena Café which are very good for food, drinks and views of the temples.

    3rd stop : Wat Ban Tham

    This temple isn’t very known by tourists as well but it deserves a stop.
    There’s quite a lot of steps to climb (outside and inside the belly of the dragon) but at the end you’ll be rewarded by a very nice cave filled with Buddha statues.
    If you want to continue, you can climb even more to the top of the mountain for the best view of the region.

    For drone, very simple here : just launch from the parking lot.

    4th stop : Giant Tree

    One of the latest attractions in Kanchanaburi is this giant Rain Tree which is believed to be over 100 years old.
    Not much to see here, so you can just walk around 5-10 minutes and go on your way.
    Would be interesting to see from drone if it looks good or not.

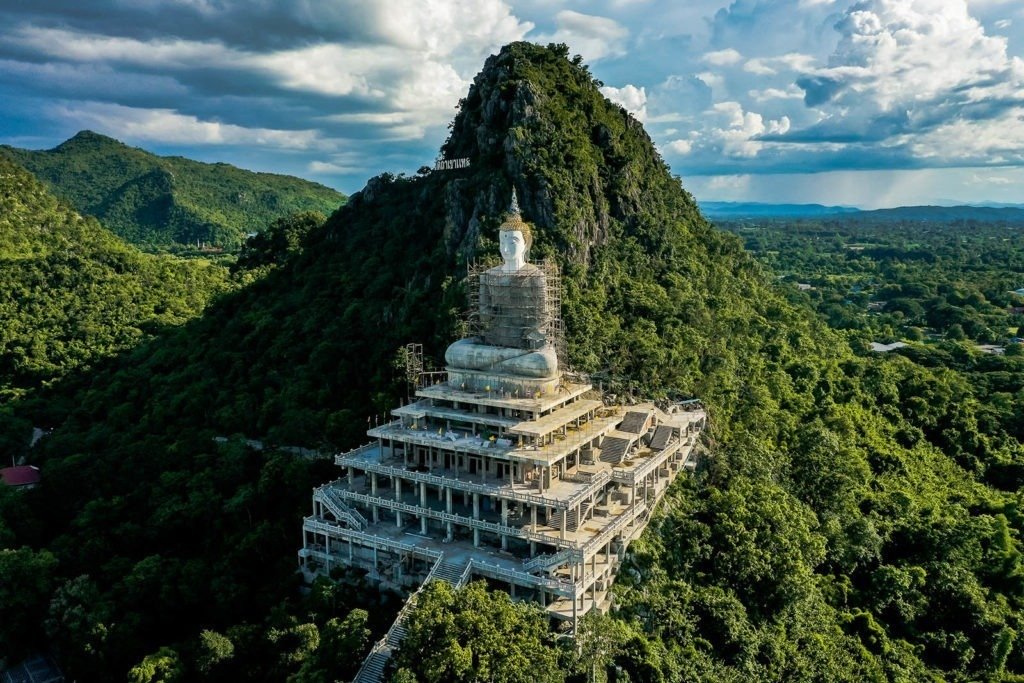
    5th stop : Wat Tham Khao Laem

    This is a very quiet temple with nobody around except monks and workers.
    At the time of the visit (june 2021), they were still working on the giant buddha, not sure when it will be finished.
    They were a few lazy dogs and monkeys around the temple.
    For drone, super easy, just launch from parking lot to get the best view of the big buddha and the mountain.

    6th stop : Dedthodsaphak Restaurant / U Inchantree Kanchanaburi Hotel

    Last stop for sunset is Dedthodsaphak Restaurant where you can have dinner the feet in the river.
    For the hotel, I chose U Inchantree Kanchanaburi Hotel which was quite cheap (1,600 thb) with a very nice pool and restaurant by the river.
    The photo on the left was taken at sunset from the hotel terrace.

    Day 2 : google map itinerary here.

    1st stop : Bridge on the River Kwai

    Probably the most famous attraction in Kanchanaburi.
    Frankly, except if you’re interested by history, there’s not much to see here. But if you have time, you can ride the train til the death railway bridge.

    For drone, as it’s quite crowded, I walked a bit further away on the river side to find a quiet place to launch it.

    Stop 2 : Shinto Park

    This park was made for the japanese community in Kanchanaburi so they have a little bit of home far away from home.
    Not much to see here, so you can skip it if you don’t have much time.

    Stop 3 : Wat Tham Pu Wa

    This cave is a must see !
    Outside there are already very nice looking temples and buddha statues made with some kind of mud, very photogenic.
    But the real attraction is inside where you can walk around a huge cave with buddhas and monk statues everywhere.
    It’s quite popular with locals, so expect some people around.

    For drone, you can launch from parking lot, but the views are not super interesting.

    Stop 4 : Wat Metta Thamrat

    That chinese temple is a must see as well ! The big surprise of my day actually.
    It’s quite huge with some kind of big warehouse in construction, but when you go inside, there are some fabulous statues and traditional chinese decorations. Very impressive !

    Stop 5 : Prasat Muang Singh National Park

    This historical park is a bit like Phanum Rung in Thailand, or a mini Angkor Wat.
    There’s not much to see here, just 1 big temple ruin in the center and a few other smaller ruins around.
    It costs 100 thb for the entrance and 50 thb for the parking.

    I’ve launched the drone because there was nobody around at that time (during covid), but I’m not sure if it’s allowed or not. So take some precautions.

    Stop 6 : Death Railway Bridge

    Another popular attraction, this bridge is in my opinion more interesting and photogenic than The bridge on the river Kwai.
    From here you can ride the train or simply walk on the railway to access a cave.
    Train timetables change a lot (especially during covid) so check the informations online first. When I was there, train was supposed to arrive at 15:15.
    There are many places around where you can launch your drone above the river, no worries here.

    Stop 7 : Lawa Cave

    This cave was quite a disappointment for me.
    First they charge 3 times more for foreigners (300 thb) and there’s not much to see inside with not much lights as well.
    The road to go there was quite bad as well, so unless you’re a big fan of caves, I’d skip this stop.

    Stop 8 : Home Phutoey River Kwai Hotspring & Nature Resort

    Last stop of the day : the resort.
    Quite cheap as well (1,200 thb), this resort is quite nice with big rooms, not very modern but everything you need inside. But the best thing is the hot spring in the resort : few small cold and hot baths from 18 to 45 degrees and a big swimming pool overlooking a small lake at 35-40 degrees. After a long day driving and shooting, this was very appreciable.

    Day 3 : Google maps itinerary here

    Stop 1,2,3,4,5 : Closed
    I wasn’t very lucky here : Sai Yok Yai Waterfall, Hin Dat Hot Spring, Pha Tad Waterfall, Thong Pha Phum National park and Jogkradin Waterfall were all closed either because of covid or because of maintenance of the national park.
    Hopefully we called the day before, so we just went directly to Sangkhlaburi and took our time to organize a small picnic at Mon bridge for the sunset.

    Stop 6 : Underwater Temple Vajiralongkorn

    Here the sunken temple was not under water and was in construction. Local people propose to take you there by boat, but I just launched my drone from the end of the road behind the Stupa in Bodh Gaya and it was enough to take the shots (1,4 km away ! Quite impressed with my mavic pro 2 here).
    It would be nice to check the place by boat when it’s underwater.

    Stop 7 : Phutthakhaya Chedi, or Stupa in Bodh Gaya

    This stupa looks better from the sky than from the ground where you can see the river around.
    Otherwise not much to see inside. There’s a market normally near the entrance but it was closed due to covid when I was there.
    There’s a big parking where you can launch your drone easily.

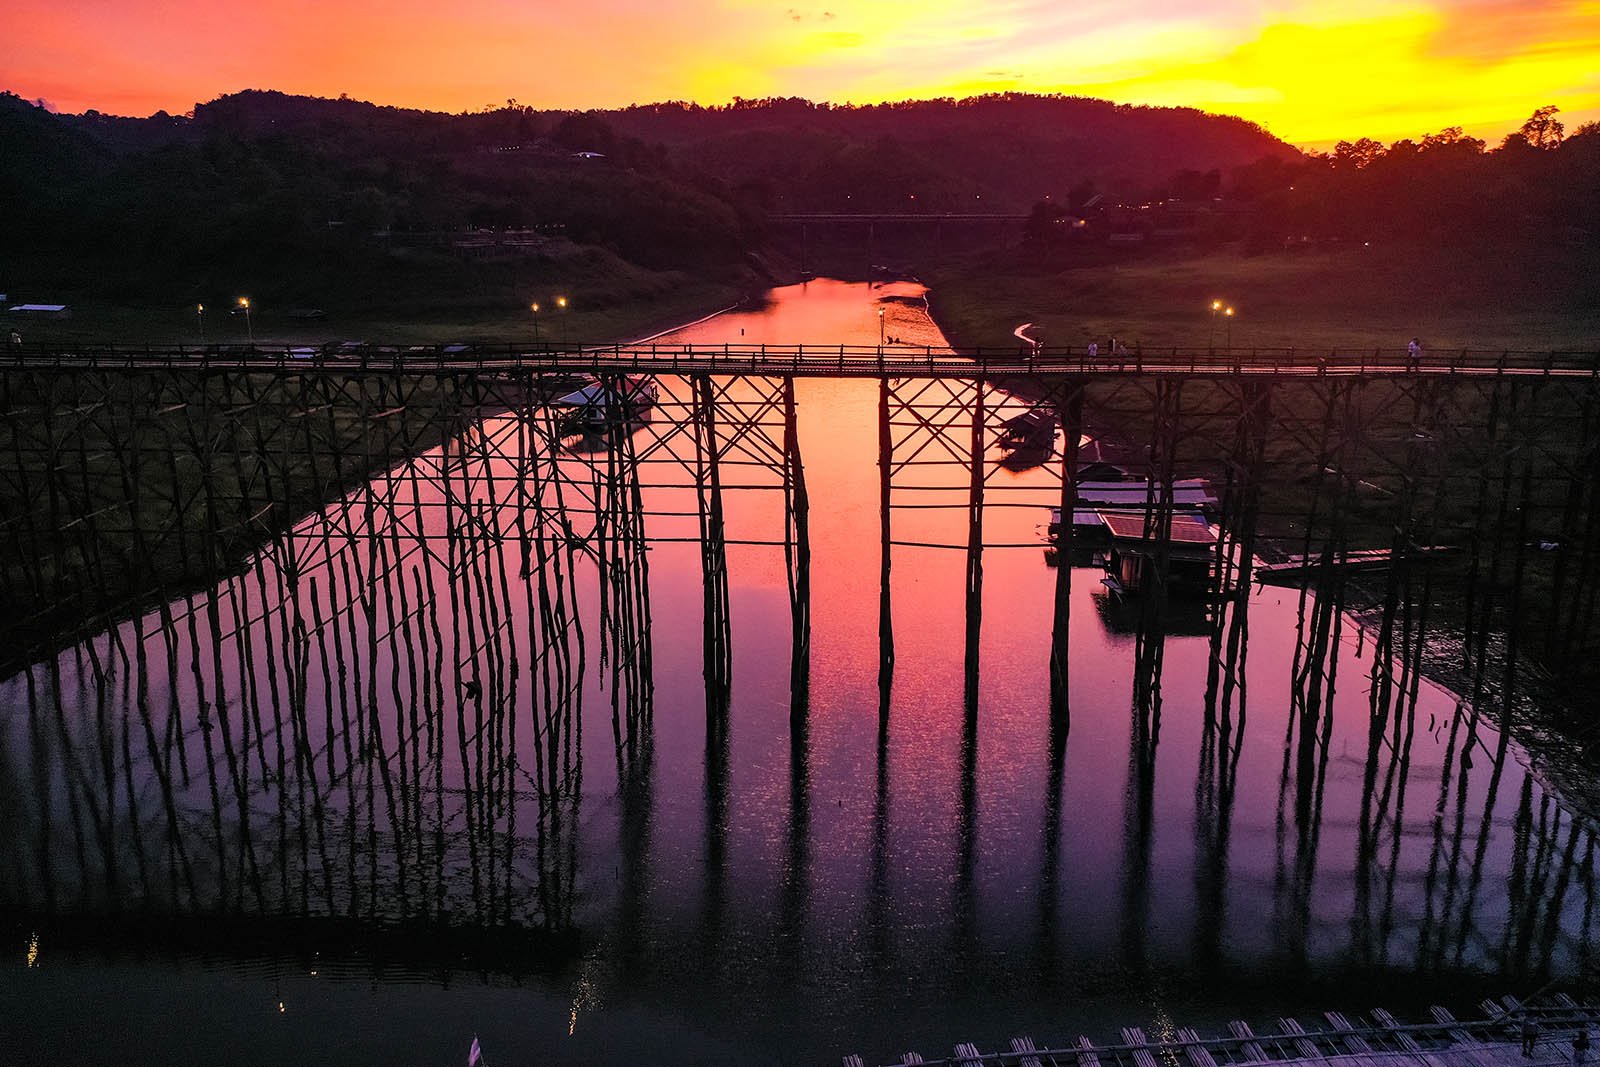
    Stop 8 : Mon bridge

    Mon bridge was the highlight of my trip in Kanchanaburi !
    We prepared a picnic on the floating bamboo bridge and wait for sunset which was fabulous !
    Here you can launch a drone from anywhere, just check the sky as there are few other people who have the same idea during sunsets.
    There are also small cafes and restaurants with good views around if you prefer not to picnic.
    If I had more time, I would have added Wat Wang Wiwekaram, as I saw very nice pictures of it from drone afterwards.

    I stayed in the Siriboonsampao Resort for 780 thb. Not recommended, can probably find better in the city. but for that price, it was ok.

    Day 4 : Google maps itinerary here.

    Stop 1 : Nang Kruan waterfall in Lam Khlong Ngue National park : closed due to covid.

    Stop 2 : Huai Mae Khamin Waterfall

    This waterfall was another highlight of my trip in Kanchanaburi !
    I found it personally more beautiful than Erawan waterfalls which are also much more crowded.
    It is made up of 7 tiers, the trail is divided into two sections: tiers 5-7 and 4-1. If you don’t have much time, focus on the tier 4-1.

    Bring your tripod for long exposure photos and some ND filters, you’ll have some great results !
    No drone possible or needed here.

    VERY IMPORTANT : I took the road from the north to arrive at this waterfall, and that was NOT a road at all !!! I spent 2 hours driving on some rocky paths and I was lucky not to break my car. Even if you have a 4×4 wheel drive car, I wouldn’t recommend to take this path.
    Come from Kanchanaburi / Erawan waterfalls, the road is excellent that way.

    Stop 4 : Erawan National Park and Tham Phra That Cave : Closed due to covid.
    Not much a problem for me as I visited Erawan waterfalls a few years ago already. But you should definitely make a stop if you have time.

    Hotel for the night : Good times resort (1,500 thb). Not recommended.

    Day 5 : Back to Bangkok, Google maps itinerary here.

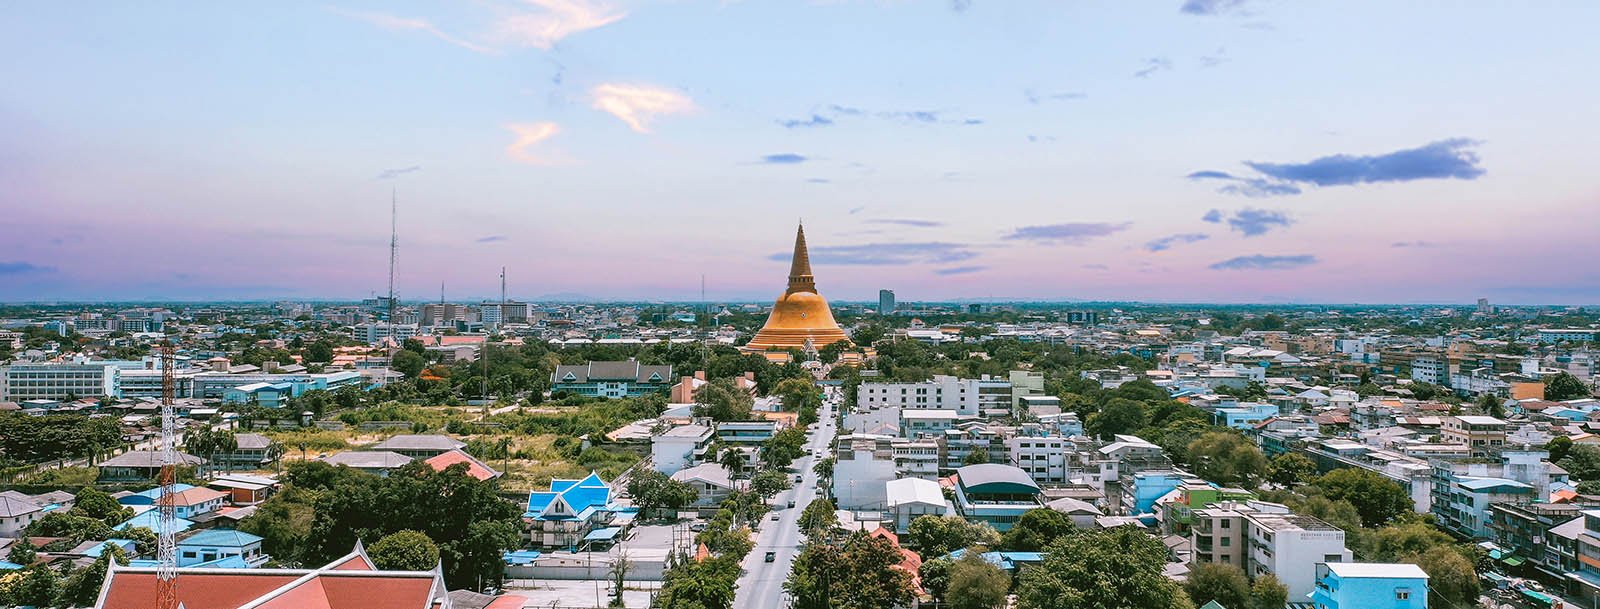
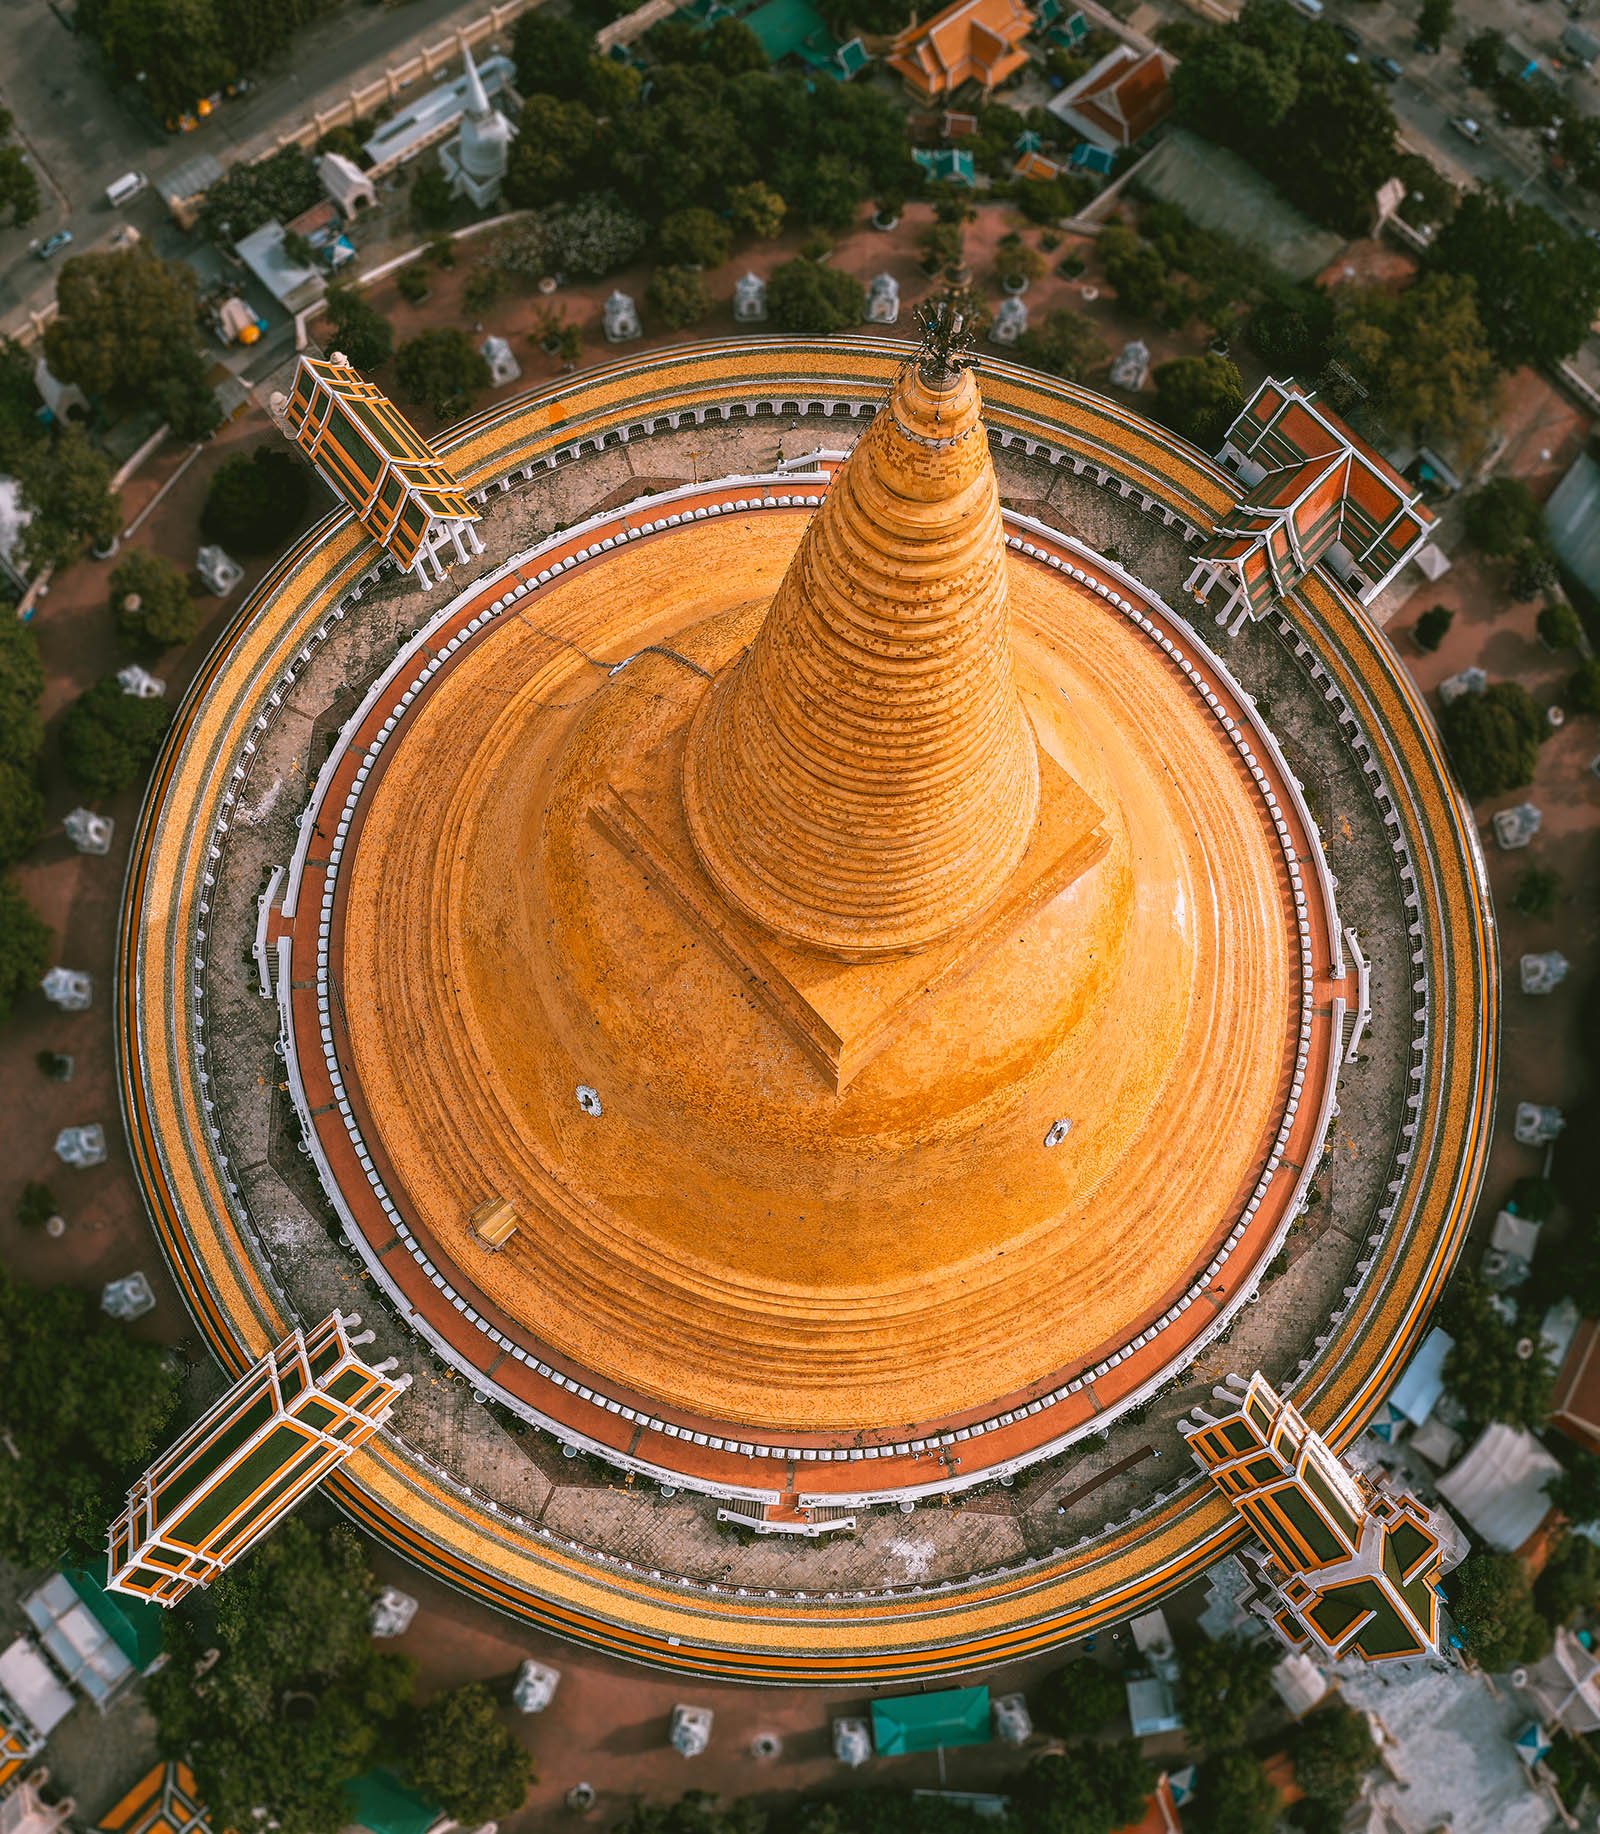
    Stop 1 : Phra Pathom Chedi 

    Phra Pathom Chedi is super impressive ! It’s the biggest chedi in Thailand and it’s a real wonder.
    It’s very beautiful either from the ground or from the air.

    For drone, you can launch from the little park outside near the parking area.

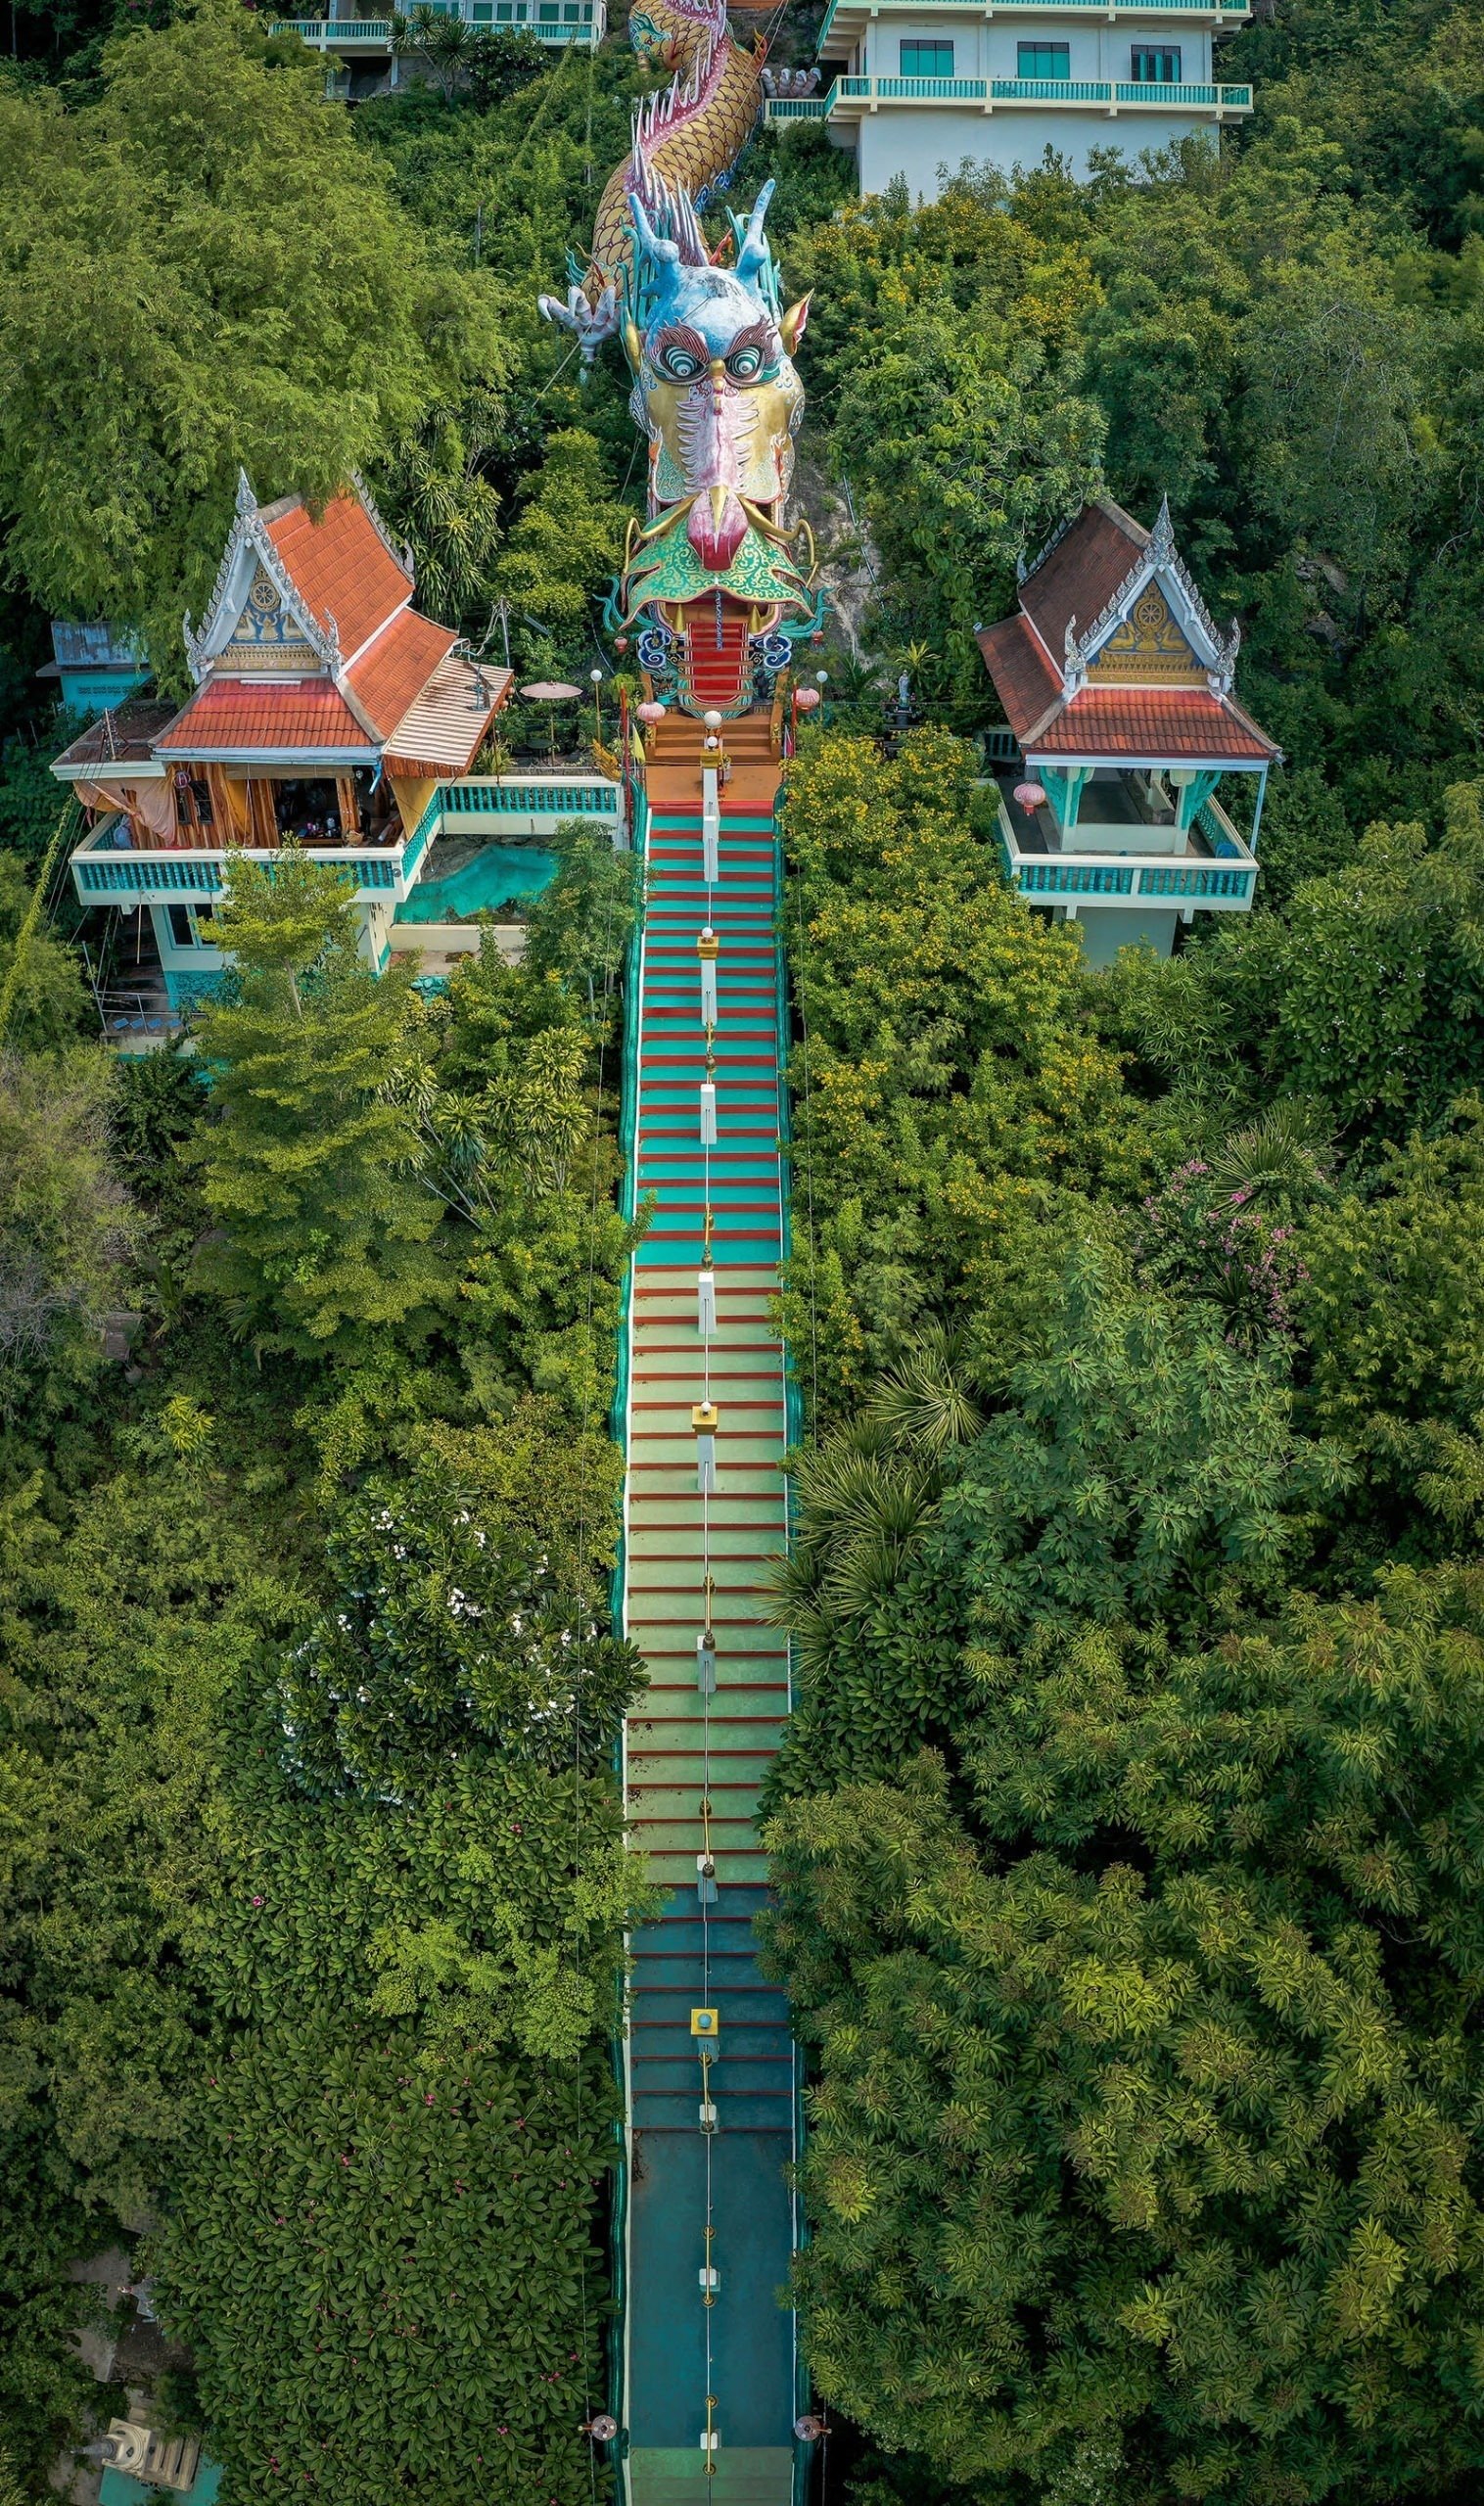
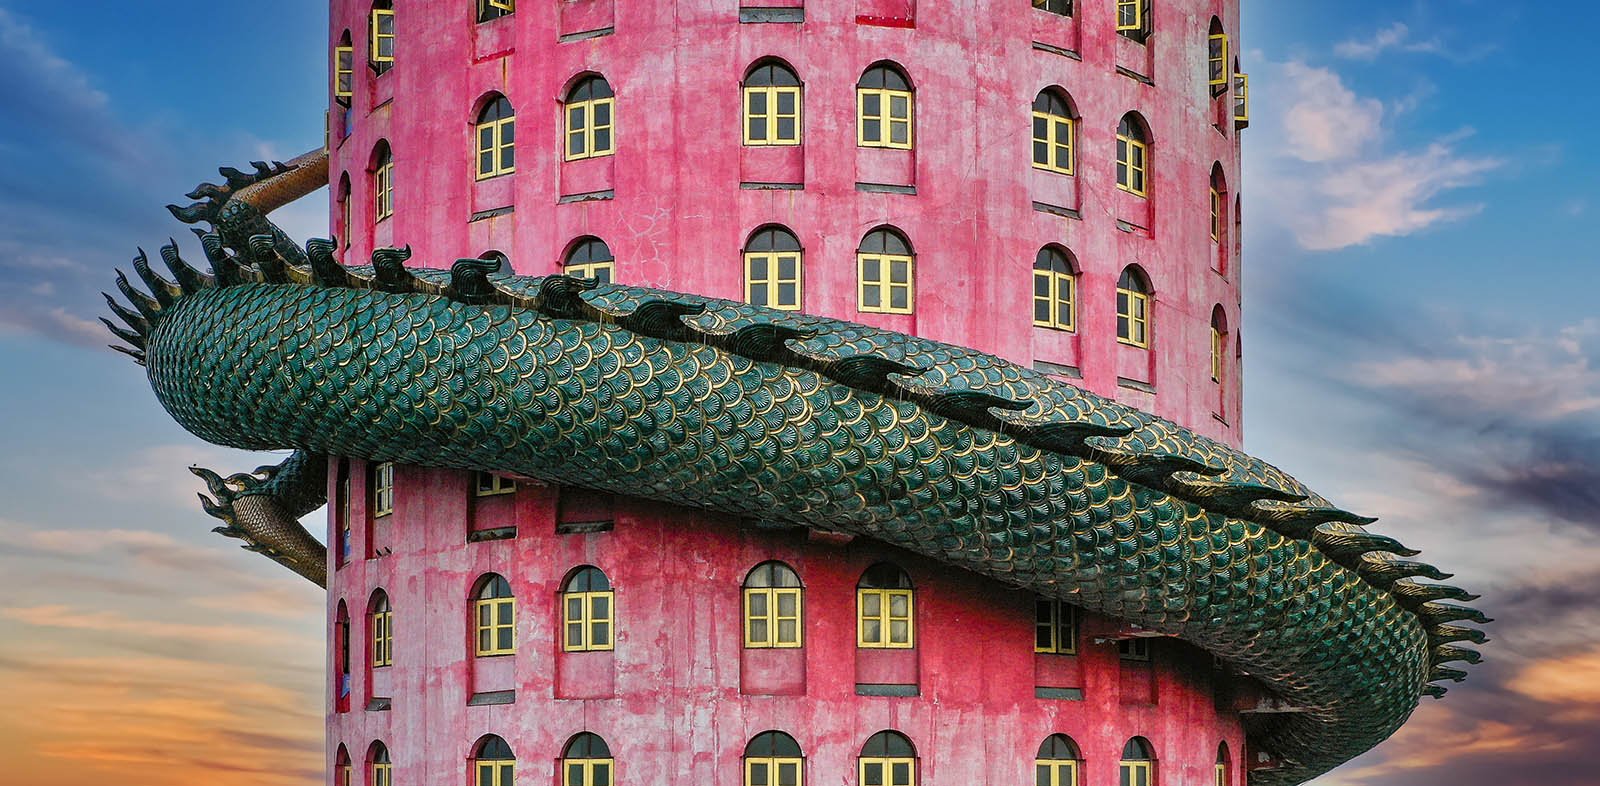
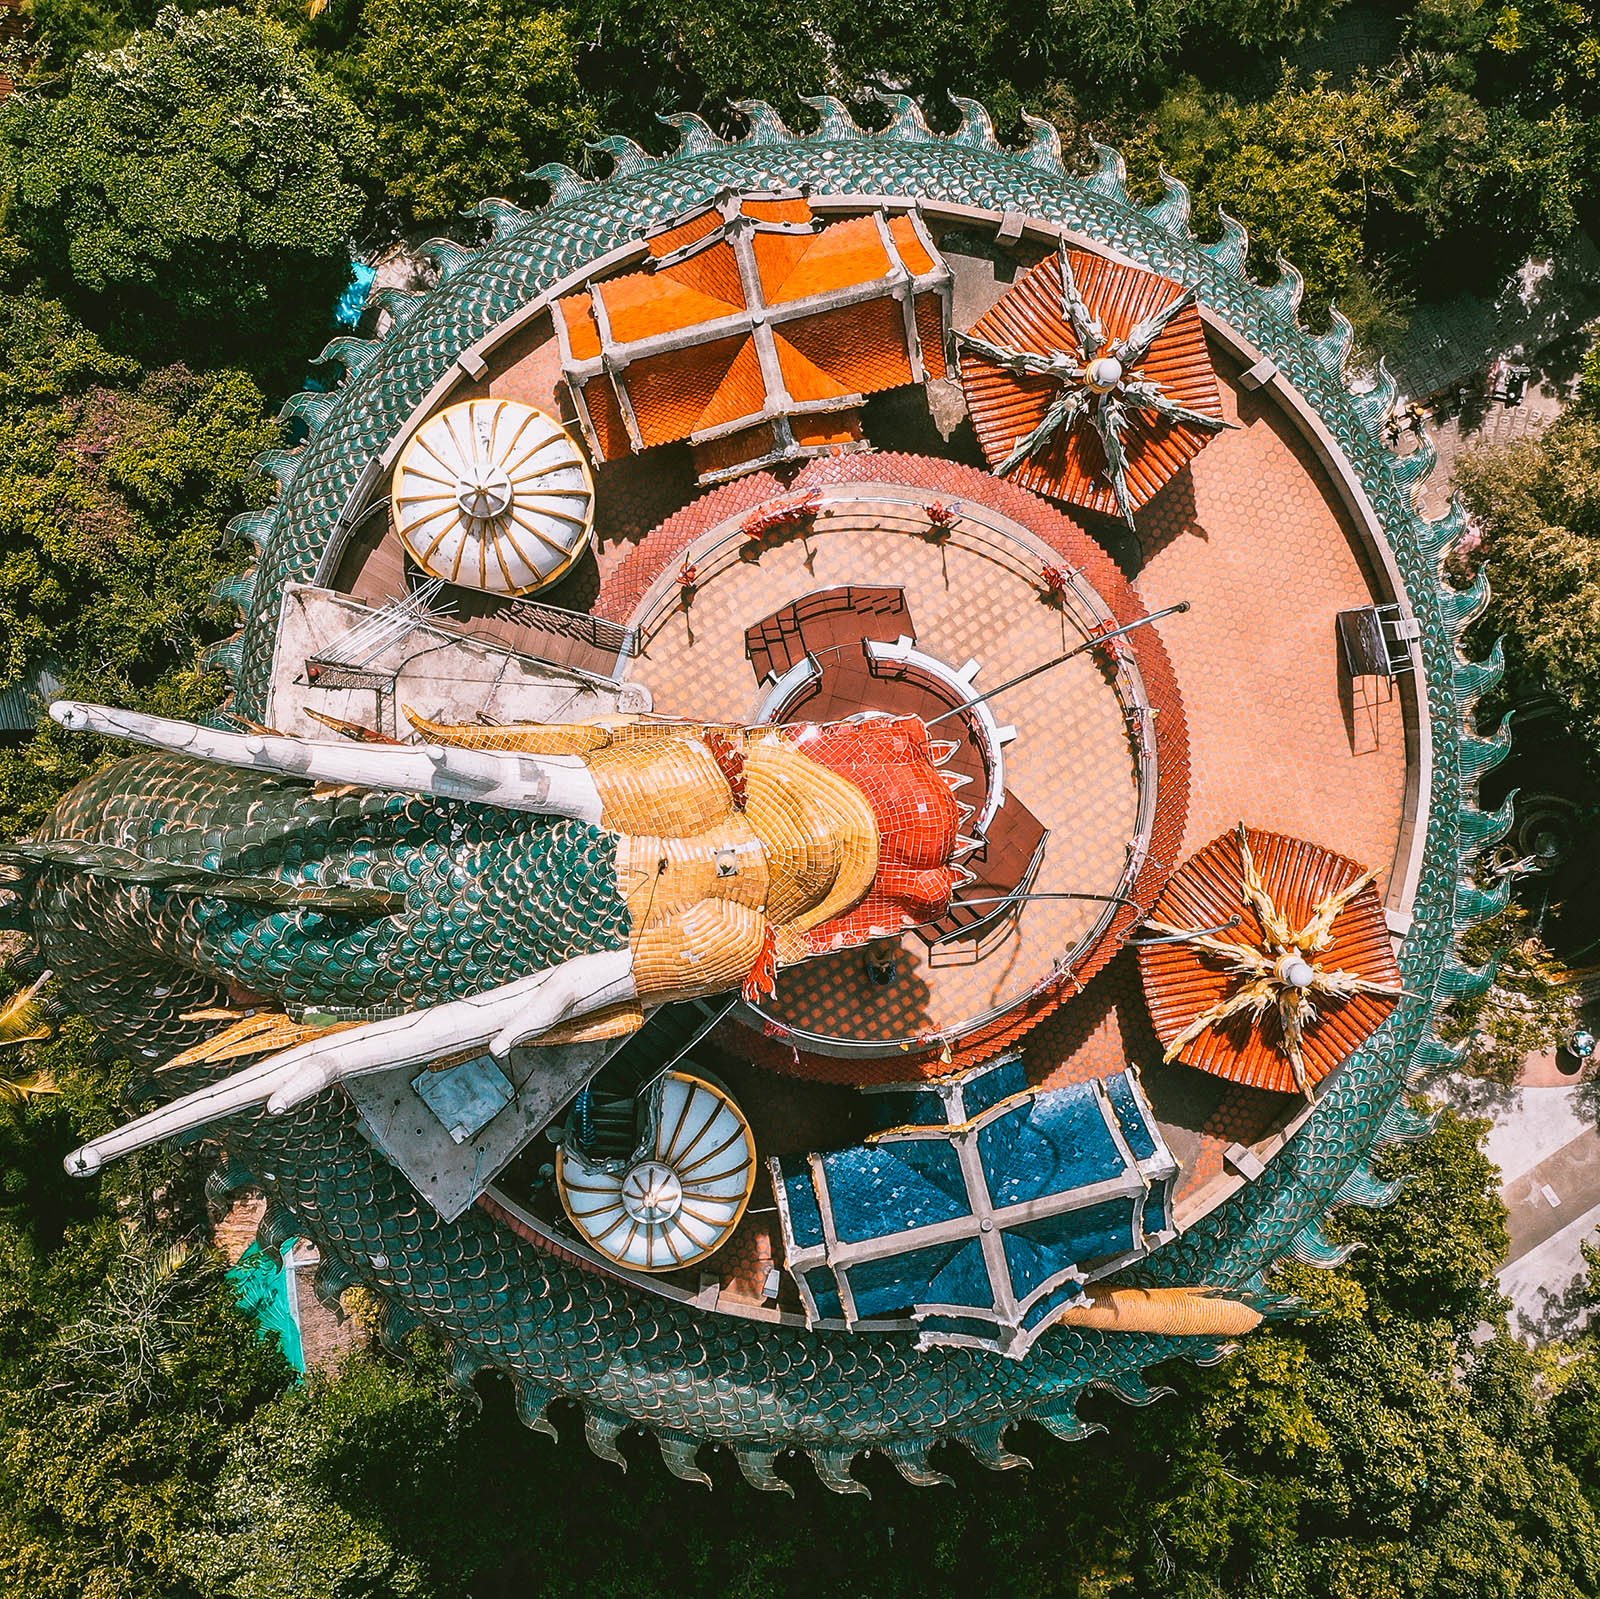
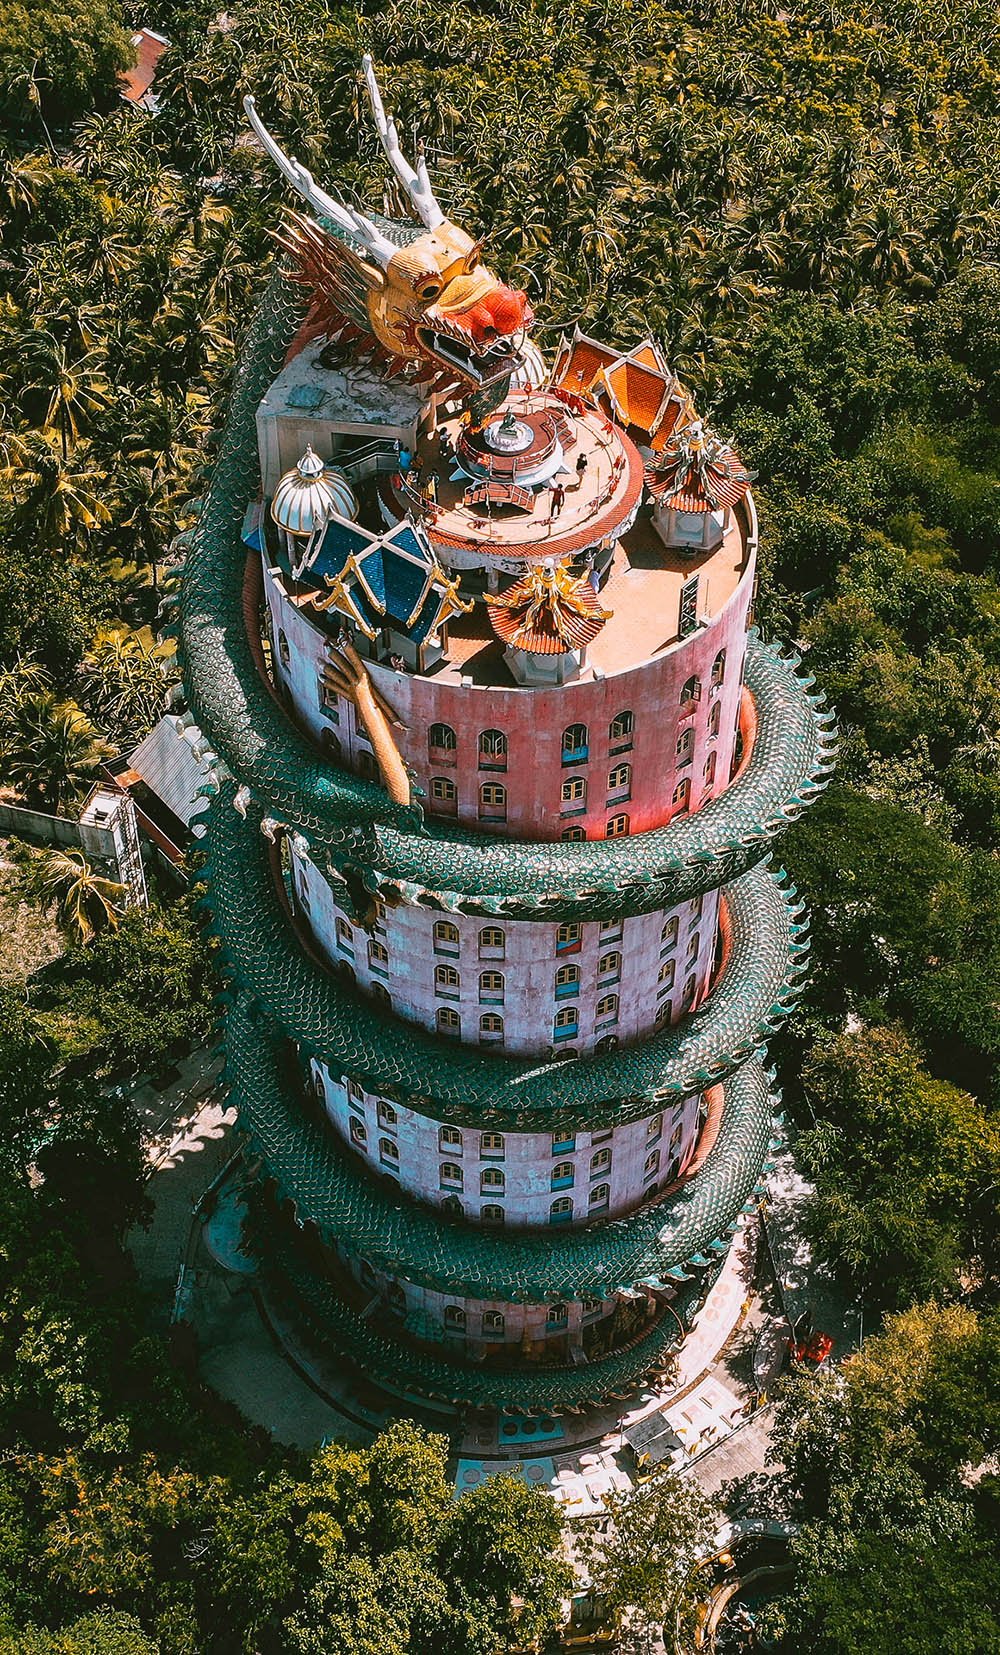
    Stop 2 : Wat Samphran / Dragon temple

    I really love this temple, the dragon architecture is really cool !
    It’s a must stop for every drone user, and there’s probably a big chance that you will encounter drone pilots on the parking lot just before sunset.
    Go inside as well, climb inside the belly of the beast and access the top platform for some good views. Though around the view is mostly city, it’s not the best.
    Go for sunset to get the sun at the level of the dragon’s mouth for some cool effect.

    Stop 3 : Bubbles in the forest

    For a cool stop at a cafe reminding you the Maldives, you can stop at Bubbles in the forest cafe on the way back to Bangkok.
    To be honest I didn’t have the patience to wait for the 1 hour queue, so I just went to the parking to fly my drone 🙂

  • Voyage Thaïlande : Itinéraire Kanchanaburi 5J/4N

    Voyage Thaïlande : Itinéraire Kanchanaburi 5J/4N

    Pour mon voyage à Kanchanaburi, j’ai loué une voiture à Bangkok et divisé mon voyage en 5 jours/4 nuits pour parcourir un maximum d’attractions à photographier. C’était un voyage fatigant, mais j’en ai profité au maximum !

    C’était mon itinéraire pour Jour 1 : googlemaps link here.

    1er stop : Wat Khao Sung Chaem Fa

    Ce temple n’est pas très connu des touristes mais c’est un joyau caché !
    À l’entrée, vous vous sentez comme au Japon avec les centaines de portes Torii qui montent vers le temple principal, en passant devant des statues de Ganesh et de grands bouddhas.
    Au sommet de la colline, vous trouverez un bouddha doré couché, une immense statue de moine, une plus grande statue de dragon serpent crachant de l’eau dans un étang rempli de poissons entouré d’arbres et de petits ponts japonais.
    C’est un peu désordonné mais c’est parfait pour de belles opportunités de photos.
    Vous pouvez également lancer votre drone facilement depuis le parking, et comme ce temple n’est pas bondé, vous ne dérangeriez personne qui vole.

    2nd stop : Wat Tham Khao Noi & Wat Tham Sua

    C’est l’attraction principale et le plus beau temple de Kanchanaburi.
    Il est composé de 2 temples différents avec 2 entrées différentes. Préparez-vous à monter beaucoup d’escaliers !

    Wat Tham Sua est le temple principal avec le bouddha assis géant. Je suggère fortement de monter au sommet de la plus grande tour (sur la gauche près de l’entrée) où vous pourrez avoir la meilleure vue sur l’ensemble du complexe.

    Wat Tham Khao Noi est le temple de la tour chinoise. C’est moins impressionnant que le wat Tham Sua mais il y a de superbes vues du haut de la tour (je pense que 8 ou 9 étages à monter quand même !).

    En termes de photographie, je recommande d’y aller soit pour le lever ou le coucher du soleil pour obtenir les meilleures couleurs.
    Pour le drone, c’est très simple de lancer le drone depuis l’un des parkings.
    Je recommande également de faire le tour des rizières pour avoir des vues de loin. Il y a quelques bons cafés comme Rak Kanna Café ou Meena Café qui sont très bons pour la nourriture, les boissons et les vues sur les temples.

    3eme stop : Wat Ban Tham

    Ce temple n’est pas non plus très connu des touristes mais il mérite qu’on s’y arrête.
    Il y a pas mal de marches à gravir (à l’extérieur et à l’intérieur du ventre du dragon) mais à la fin vous serez récompensé par une très belle grotte remplie de statues de Bouddha.
    Si vous voulez continuer, vous pouvez grimper encore plus au sommet de la montagne pour avoir la meilleure vue sur la région.

    Pour le drone, très simple ici : il suffit de lancer depuis le parking.

    4eme stop : Giant Tree

    L’une des dernières attractions de Kanchanaburi est cet arbre à pluie géant qui aurait plus de 100 ans.
    Pas grand-chose à voir ici, vous pouvez donc marcher environ 5 à 10 minutes et continuer votre chemin.
    Ce serait intéressant de voir depuis un drone si ça a l’air bien ou pas.

    5eme stop : Wat Tham Khao Laem

    C’est un temple très calme avec personne autour sauf des moines et des ouvriers.
    Au moment de la visite (juin 2021), ils travaillaient encore sur le bouddha géant, sans savoir quand il sera terminé.
    Ils étaient quelques chiens et singes paresseux autour du temple.
    Pour le drone, super facile, lancez-vous simplement depuis le parking pour avoir la meilleure vue sur le grand bouddha et la montagne.

    6eme stop : Dedthodsaphak Restaurant / U Inchantree Kanchanaburi Hotel

    Dernier arrêt pour le coucher du soleil, le restaurant Dedthodsaphak où vous pourrez dîner les pieds dans la rivière.
    Pour l’hôtel, j’ai choisi l’hôtel U Inchantree Kanchanaburi qui était assez bon marché (1 600 thb) avec une très belle piscine et un restaurant au bord de la rivière.
    La photo de gauche a été prise au coucher du soleil depuis la terrasse de l’hôtel.

    Jour 2 : google map itinéraire ici.

    1er stop : Pont de la Riviere Kwai

    Probablement l’attraction la plus célèbre de Kanchanaburi.
    Franchement, sauf si vous êtes intéressé par l’histoire, il n’y a pas grand chose à voir ici. Mais si vous avez le temps, vous pouvez prendre le train jusqu’au death railway bridge.

    Pour le drone, comme c’est assez encombré, j’ai marché un peu plus loin du côté de la rivière pour trouver un endroit tranquille pour le lancer.

    Stop 2 : Shinto Park

    Ce parc a été conçu pour la communauté japonaise de Kanchanaburi afin qu’ils aient un petit chez-soi loin de chez eux.
    Pas grand chose à voir ici, vous pouvez donc le sauter si vous n’avez pas beaucoup de temps.

    Stop 3 : Wat Tham Pu Wa

    Cette grotte est à voir absolument !
    Dehors, il y a déjà de très beaux temples et des statues de bouddha faites avec une sorte de boue, très photogéniques.
    Mais la véritable attraction est à l’intérieur où vous pouvez vous promener dans une immense grotte avec des bouddhas et des statues de moines partout.
    C’est assez populaire auprès des habitants, alors attendez-vous à des gens autour.

    Pour le drone, vous pouvez lancer depuis le parking, mais les vues ne sont pas super intéressantes.

    Stop 4 : Wat Metta Thamrat

    Ce temple chinois est également à voir absolument ! La grosse surprise de ma journée en fait.
    C’est assez énorme avec une sorte de grand entrepôt en construction, mais quand vous entrez, il y a des statues fabuleuses et des décorations chinoises traditionnelles. Très impressionnant !

    Stop 5 : Prasat Muang Singh National Park

    Ce parc historique est un peu comme Phanum Rung en Thaïlande, ou un mini Angkor Wat.
    Il n’y a pas grand chose à voir ici, juste 1 grande ruine de temple au centre et quelques autres ruines plus petites autour.
    Il en coûte 100 thb pour l’entrée et 50 thb pour le parking.

    J’ai lancé le drone parce qu’il n’y avait personne à ce moment-là (pendant le covid), mais je ne sais pas si c’est autorisé ou non. Prenez donc quelques précautions.

    Stop 6 : Death Railway Bridge

    Autre attraction populaire, ce pont est à mon avis plus intéressant et photogénique que Le pont sur la rivière Kwai.
    De là, vous pouvez prendre le train ou simplement marcher sur la voie ferrée pour accéder à une grotte.
    Les horaires des trains changent beaucoup (surtout pendant le covid), alors vérifiez d’abord les informations en ligne. Quand j’y étais, le train devait arriver à 15h15.
    Il existe de nombreux endroits où vous pouvez lancer votre drone au-dessus de la rivière, pas de soucis ici.

    Stop 7 : Lawa Cave

    Cette grotte m’a beaucoup déçue.
    D’abord, ils facturent 3 fois plus cher pour les étrangers (300 thb) et il n’y a pas grand-chose à voir à l’intérieur avec peu de lumières également.
    La route pour y aller était également assez mauvaise, donc à moins que vous ne soyez un grand fan de grottes, je sauterais cet arrêt.

    Stop 8 : Home Phutoey River Kwai Hotspring & Nature Resort

    Dernière étape de la journée : la station.
    Assez bon marché aussi (1 200 thb), ce complexe est plutôt agréable avec de grandes chambres, pas très modernes mais tout ce dont vous avez besoin à l’intérieur. Mais le mieux c’est la source chaude de la station : quelques petits bains froids et chauds de 18 à 45 degrés et une grande piscine surplombant un petit lac à 35-40 degrés. Après une longue journée de conduite et de tournage, c’était très appréciable.

    Jour 3 : Google maps itinéraire ici

    Stop 1,2,3,4,5 : Fermé
    Je n’ai pas eu beaucoup de chance ici : la cascade Sai Yok Yai, la source chaude Hin Dat, la cascade Pha Tad, le parc national de Thong Pha Phum et la cascade Jogkradin étaient toutes fermées soit à cause du covid, soit à cause de l’entretien du parc national.
    J’espère que nous avons appelé la veille, nous sommes donc allés directement à Sangkhlaburi et avons pris notre temps pour organiser un petit pique-nique au pont Mon pour le coucher du soleil.

    Stop 6 : Underwater Temple Vajiralongkorn

    Ici, le temple englouti n’était pas sous l’eau et était en construction. Des locaux proposent de vous y emmener en bateau, mais je viens de lancer mon drone du bout de la route derrière le Stupa à Bodh Gaya et ça a suffit pour prendre les clichés (à 1,4 km ! Assez impressionné par mon mavic pro 2 ici).
    Ce serait bien de vérifier l’endroit en bateau quand il est sous l’eau.

    Stop 7 : Phutthakhaya Chedi, or Stupa in Bodh Gaya

    Ce stupa est plus beau du ciel que du sol où vous pouvez voir la rivière autour.
    Sinon pas grand chose à voir à l’intérieur. Il y a un marché normalement près de l’entrée mais il était fermé à cause de covid quand j’y étais.
    Il y a un grand parking où vous pouvez lancer votre drone facilement.

    Stop 8 : Mon bridge

    Mon pont a été le clou de mon voyage à Kanchanaburi !
    Nous avons préparé un pique-nique sur le pont flottant en bambou et attendons le coucher du soleil qui était fabuleux !
    Ici, vous pouvez lancer un drone de n’importe où, il suffit de vérifier le ciel car il y a peu d’autres personnes qui ont la même idée pendant les couchers de soleil.
    Il y a aussi de petits cafés et restaurants avec de belles vues autour si vous préférez ne pas pique-niquer.
    Si j’avais eu plus de temps, j’aurais ajouté Wat Wang Wiwekaram, car j’en ai vu de très belles photos prises par drone par la suite.

    J’ai séjourné au Siriboonsampao Resort pour 780 thb. Non recommandé, peut probablement trouver mieux dans la ville. mais pour ce prix, c’était correct.

    Jour 4 : Google maps itinéraire ici.

    Stop 1 : Nang Kruan waterfall in Lam Khlong Ngue National park : fermé a cause du covid.

    Stop 2 : Huai Mae Khamin Waterfall

    Cette cascade était un autre moment fort de mon voyage à Kanchanaburi !
    Je l’ai trouvé personnellement plus beau que les cascades d’Erawan qui sont aussi beaucoup plus fréquentées.
    Il est composé de 7 niveaux, le sentier est divisé en deux sections : les niveaux 5-7 et 4-1. Si vous n’avez pas beaucoup de temps, concentrez-vous sur le niveau 4-1.

    Apportez votre trépied pour les photos en pose longue et quelques filtres ND, vous aurez de très bons résultats !
    Aucun drone possible ou nécessaire ici.

    TRES IMPORTANT : J’ai pris la route du nord pour arriver à cette cascade, et ce n’était PAS du tout une route !!! J’ai passé 2 heures à rouler sur des chemins caillouteux et j’ai eu la chance de ne pas casser ma voiture. Même si vous avez une voiture 4×4, je vous déconseille de prendre ce chemin.
    Venu des cascades de Kanchanaburi / Erawan, la route est excellente de ce côté-là.

    Stop 4 : Erawan National Park and Tham Phra That Cave : Fermé a cause du covid.
    Pas vraiment un problème pour moi car j’ai visité les cascades d’Erawan il y a quelques années déjà. Mais vous devriez certainement vous arrêter si vous avez le temps.

    Hôtel pour la nuit : Good times resort (1500 thb). Non recommandé.

    Jour 5 : Retour a Bangkok, Google maps itinéraire ici.

    Stop 1 : Phra Pathom Chedi

    Phra Pathom Chedi est super impressionnant ! C’est le plus grand chedi de Thaïlande et c’est une vraie merveille.
    C’est très beau du sol ou du ciel.

    Pour les drones, vous pouvez lancer depuis le petit parc à l’extérieur près du parking.

    Stop 2 : Wat Samphran / Dragon temple

    J’adore vraiment ce temple, l’architecture du dragon est vraiment cool !
    C’est un arrêt obligatoire pour tous les utilisateurs de drones, et il y a probablement de grandes chances que vous rencontriez des pilotes de drones sur le parking juste avant le coucher du soleil.
    Entrez également à l’intérieur, montez dans le ventre de la bête et accédez à la plate-forme supérieure pour de belles vues. Bien qu’autour de la vue soit principalement la ville, ce n’est pas le meilleur.
    Optez pour le coucher du soleil pour obtenir le soleil au niveau de la bouche du dragon pour un effet cool.

    Stop 3 : Bubbles in the forest

    Pour une halte cool dans un café rappelant les Maldives, vous pouvez vous arrêter au Bubbles in the forest cafe sur le chemin du retour vers Bangkok.
    Pour être honnête, je n’ai pas eu la patience d’attendre la file d’attente d’une heure, alors je suis juste allé au parking pour faire voler mon drone 🙂

0
0
Your Cart
Your cart is emptyReturn to Shop